


Before you begin, make sure the gutters and downspouts are clean and free of debris and obstructions. From measuring, you should already know how much heat tape you’ll need and have the appropriate length.
Warning: Never use excessive force as you’re pulling cable through a gutter system. The need for excessive force indicates your heat tape cable is probably getting hung up on something, which could be a sharp edge or screw point. It could also indicate that a loop in cable is preventing it from easily moving in the direction of your pull. If the cable doesn’t move by pulling gently, determine what is causing the issue. Finally, if you are not comfortable or experienced on ladders, please hire a pro!
If you’re installing de-icing cable on the roof above the gutter, one run in the gutter should be sufficient. If no roof cable is being installed, use two runs in the gutter. Why? Because heat cables on the roof will contribute melt water to the gutter system, boosting the melting power of the cable in the gutter and downspout.
Gutters on homes in extremely cold or exceptionally snowy areas should get two runs of heat cable no matter what. Gutters on homes in more temperate climates normally only require one heat cable run.
Uncoil your heat tape in the yard in a large ‘S’ pattern, removing all twists. Plug in your cable for a few minutes to warm it up and make it more pliable. Having the cable spread out in the yard will make installation much easier. Verify that your cable is warming up to to the touch.
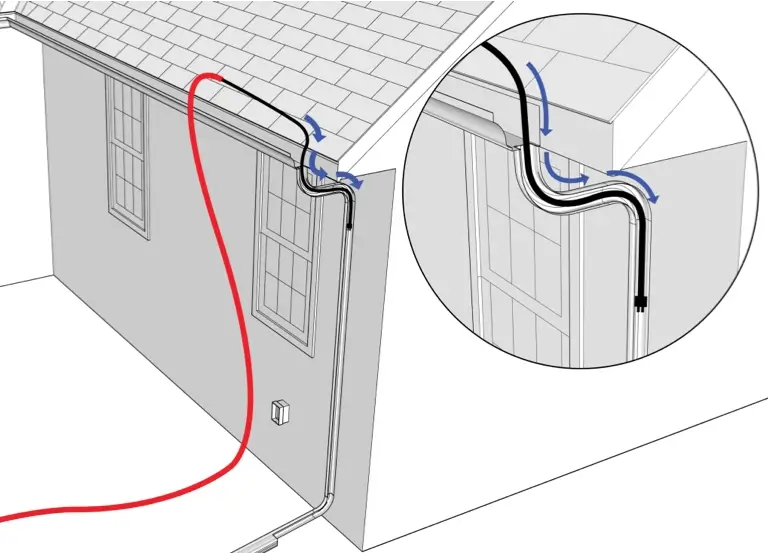
Feed the cable through the downspout closest to your power source. It’s normally easiest to drop the power cord into the downspout from above and feed it all the way down to the bottom by jiggling the cable as you go to keep the plug end from getting hung up on anything along the way. Pull the entire power cord through the downspout to reach the power supply.
If the downspouts are small or have a number of elbows the cable may not find its way down successfully. See below for few strategies for dealing with that problem:
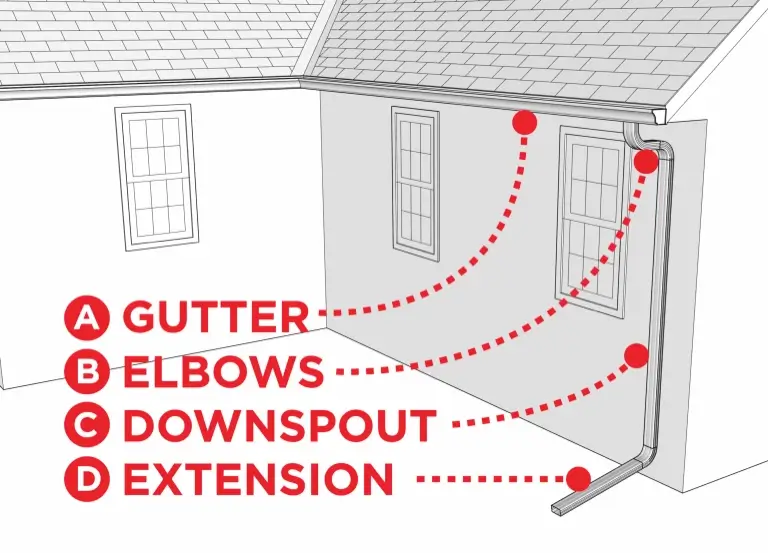
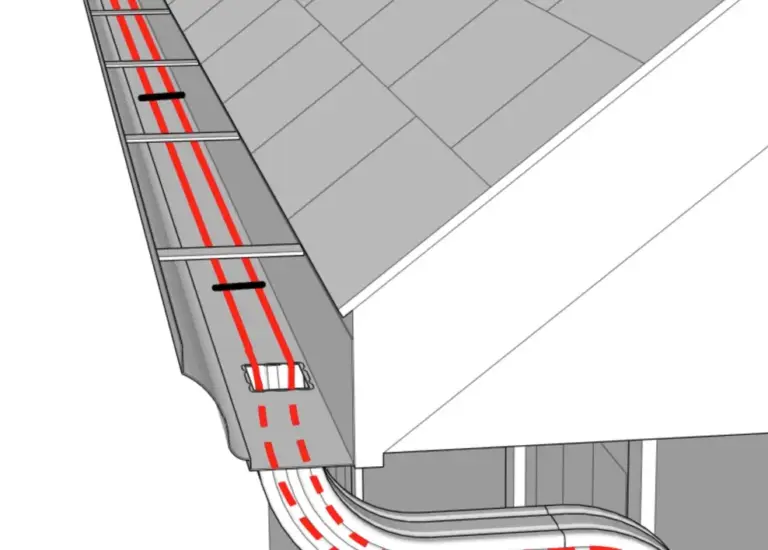
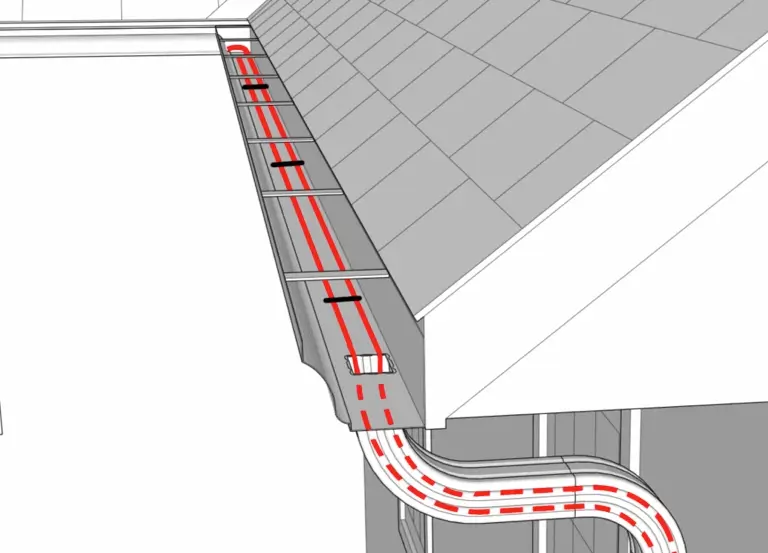
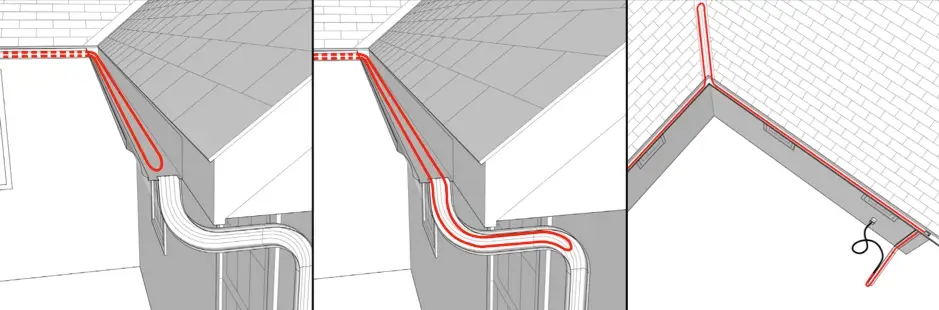
Now that you have your power cord and heat cable fed down through the downspout nearest to the power supply it’s time to run the cable in the gutter itself. Feed the heat cable along the bottom of the gutter under the gutter brackets, sometimes called ‘gutter ties’.
Run the heat tape to the end of the gutter section you are addressing and loop back for the second run. There is no need to secure the heat tape to the bottom of the gutter but we do recommend using Cable Separator Clips (RSC-555) to keep the your heat tape organized and maximize their effectiveness in terms of creating good melted pathways.
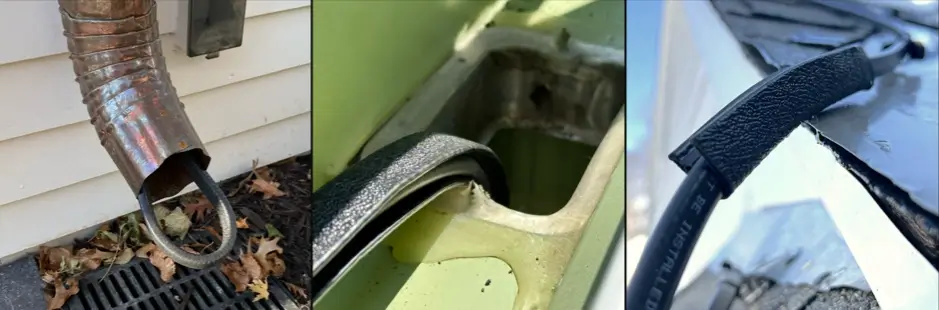
It’s essential to protect your heat cable at vulnerable locations against damage from punctures or cuts using CableGuard (CG-12). The image highlights a few common uses for CableGuard.
Bundle up excess power cord using one of the small cable ties provided with your Heat Tape Pro™. Use the screw-through cable tie to secure the bundled cord to the wall.
Heat Tape Pro™ self-regulating heat cable can be overlapped, which means excess cable can simply be looped back in the gutter or down the downspout to ‘use up’ the extra cable. Excess heat cable on installations including the roof can be absorbed by increasing the height of the tracing pattern at one or more locations or by increasing the amount of cable installed up a valley.
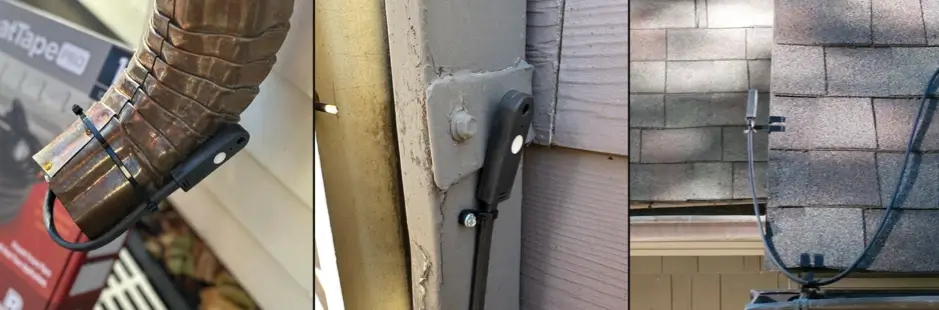
Heat Tape Pro™ is the only cable in the world with the GlowCap™, an intelligent LED that illuminates when your cable is operating. This is particularly handy when cable is hidden inside a gutter system because it’s sometimes hard to see if the cable is working. Install your GlowCap™ in such a way that it is 1) Visible from the ground, 2) Not subject to submersion and 3) In an uphill direction. Here are different ways to install your GlowCap™ end based on a variety of applications
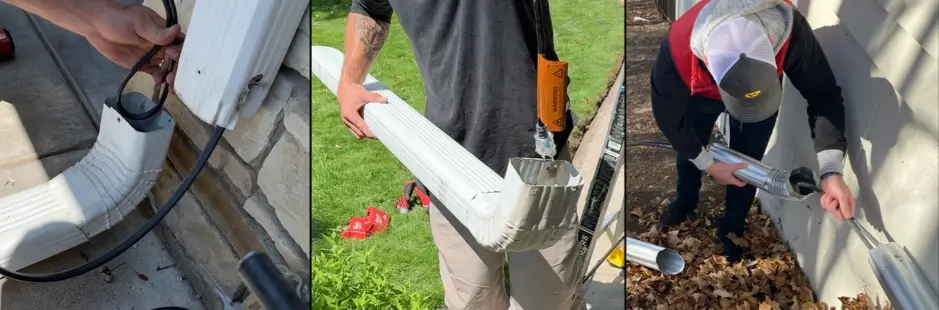
Remove one or more elbows. Use a cordless drill and a ¼” hex head driver bit to remove the screws that hold the downspout together. This process will only take a few minutes and it can save lots of headaches if the heat cable isn’t dropping through the downspout. It’s simple to feed the cable through individual elbows or small sections and then screw the downspout sections back together after the cable is installed.
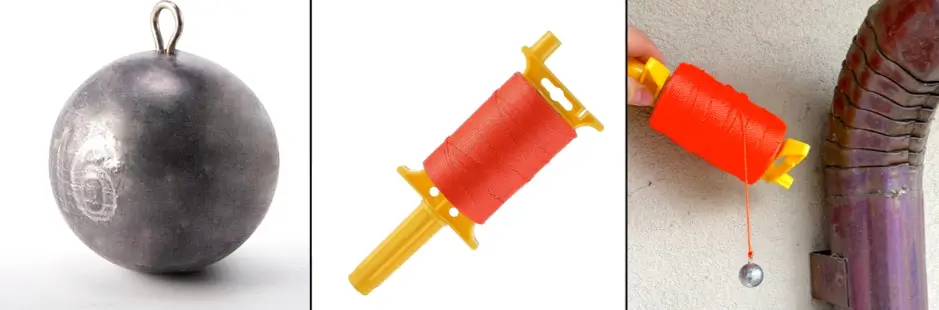
Use weighted string: Let gravity be your friend and use a string and a small weight to drop a pull-line into the downspout. Buy a 2oz. round fishing weight and tie it to the end of a string. Let gravity take the string down to the bottom of the downspout. Secure the end of your heat cable to the string and either pull it up or down the downspout.
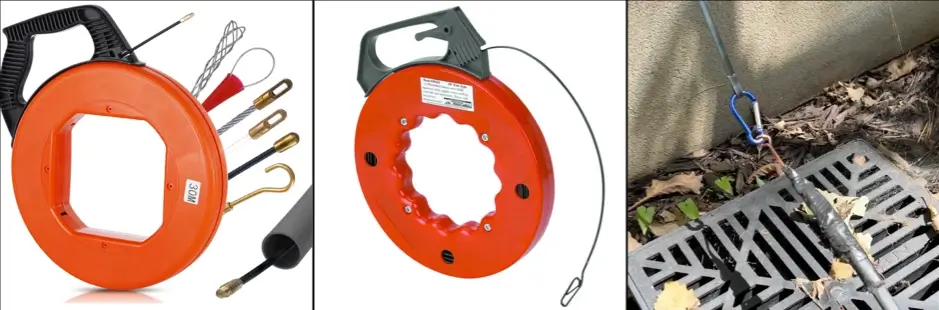
Fish tape is commonly used by electricians to pull wire through tight spots such as conduit tubing and wall cavities. It’s stiff enough to push through downspouts and can be an efficient way of pulling heat cable. After pushing the fish tape through the downspout, simply secure the heat cable to fish tape with a bunch of winds of tape (electrical, duct or masking) and gently pull the cable through.