Heat Tape for Metal Roofs

The installation of heat tape on different types of metal roofs is an effective way to prevent damage to homes that can occur as the result of Ice Dams. The installation method itself, can vary from one type of metal roof to another. This has implications on the amount of ice dame heat tape you need to purchase, as well as how you plan your installation.

Step 1:

Identify What Type of Metal Roof you Have

Different metal roofs have varying characteristics and compositions, which can affect the compatibility and effectiveness of heat tape installation. The identification process involves examining the material, finish, and overall structure of the metal roof. Some common types of metal roofs include steel, aluminum, and copper, each with its own set of properties. By accurately determining the type of metal roof you possess, you can ensure that the heat tape chosen is suitable for your roof’s specific requirements, promoting a successful and efficient installation process tailored to your roof’s unique characteristics.

Large Job Options

If your heat cable project requires more than 150 feet, you have two simple options: Use a pair of our plug-in ready HeatTapePRO cables or, hardwire a single 240 volt cable from a spool.

Option 1:

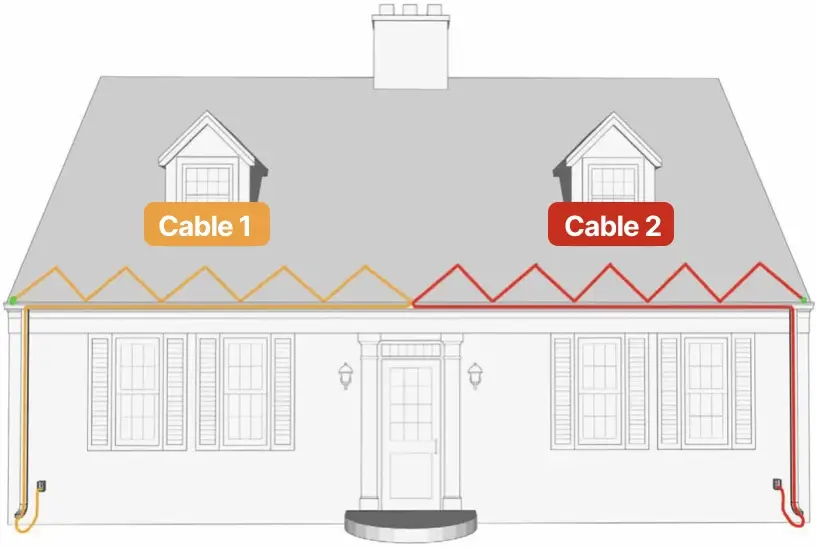
heat tape installation 2 cables

Two Plug-in Cables

Requires Two Outlets on Different Circuits

It’s often possible to use two standard, plug-in ready HeatTapePRO cables to addess larger areas. You will need to plug the cable into separate outlets on different circuits. Remember, all HeatTapePRO cables have a 10-foot length of power cord not included in it’s stated length.

To use two plug-in cables, divide your planned layout into two sections, and calculate the length needed for each.

Option 2:

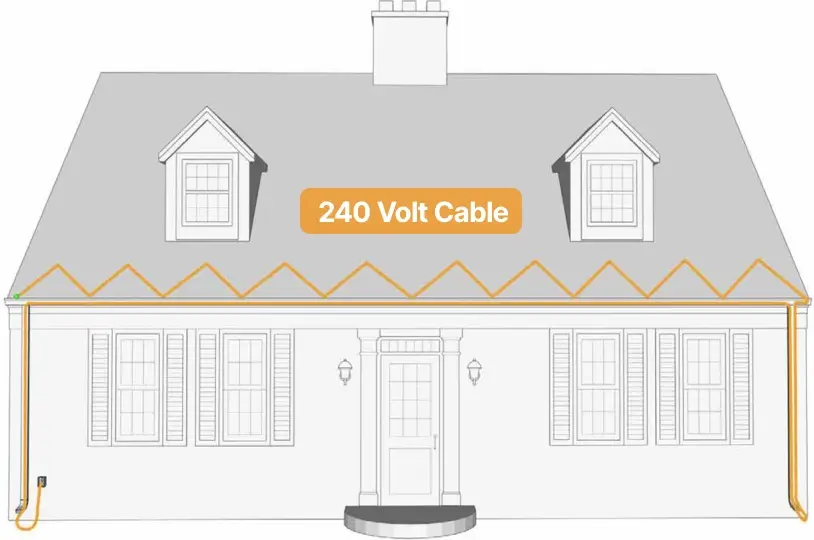
heat tape installation 240v cable

A Single 240 Volt Cable

Hardwired: Requires a Junction Box

You can install a lot of our 6 watt, 240 volt heat cable on a 240 volt circuit. Although our plug-in cable has a top length of 150-foot, installing spooled cable is identical to pre-assembled cables with the exception of connections and terminations. You must terminate the end of your cable with either our traditional End Seal Kit, or our popular GlowCap End Seal Kit. You will also need to connect your heat cable to a junction box fed by 240 volts using our Hardwire Connection Kit. Connection kits take about 10 minutes to execute.