$72.95 – $560.95Price range: $72.95 through $560.95
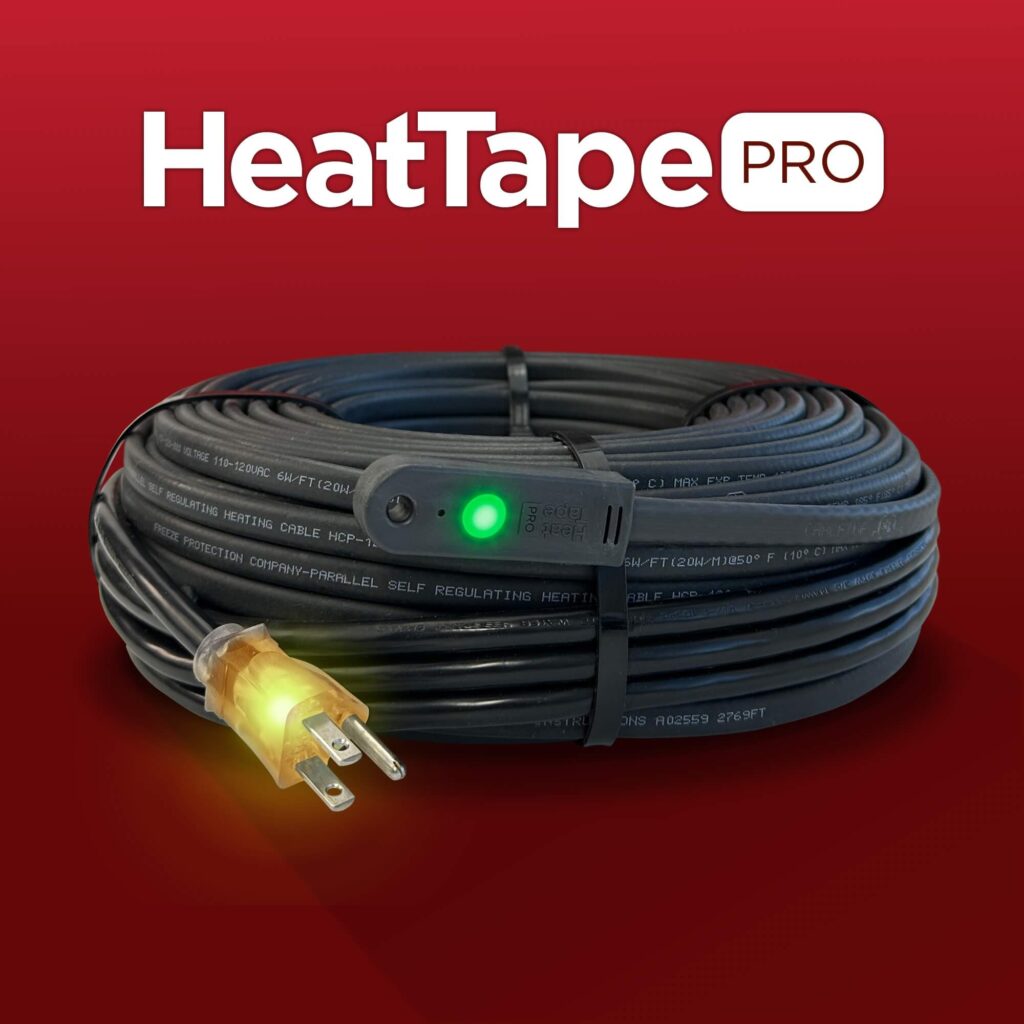
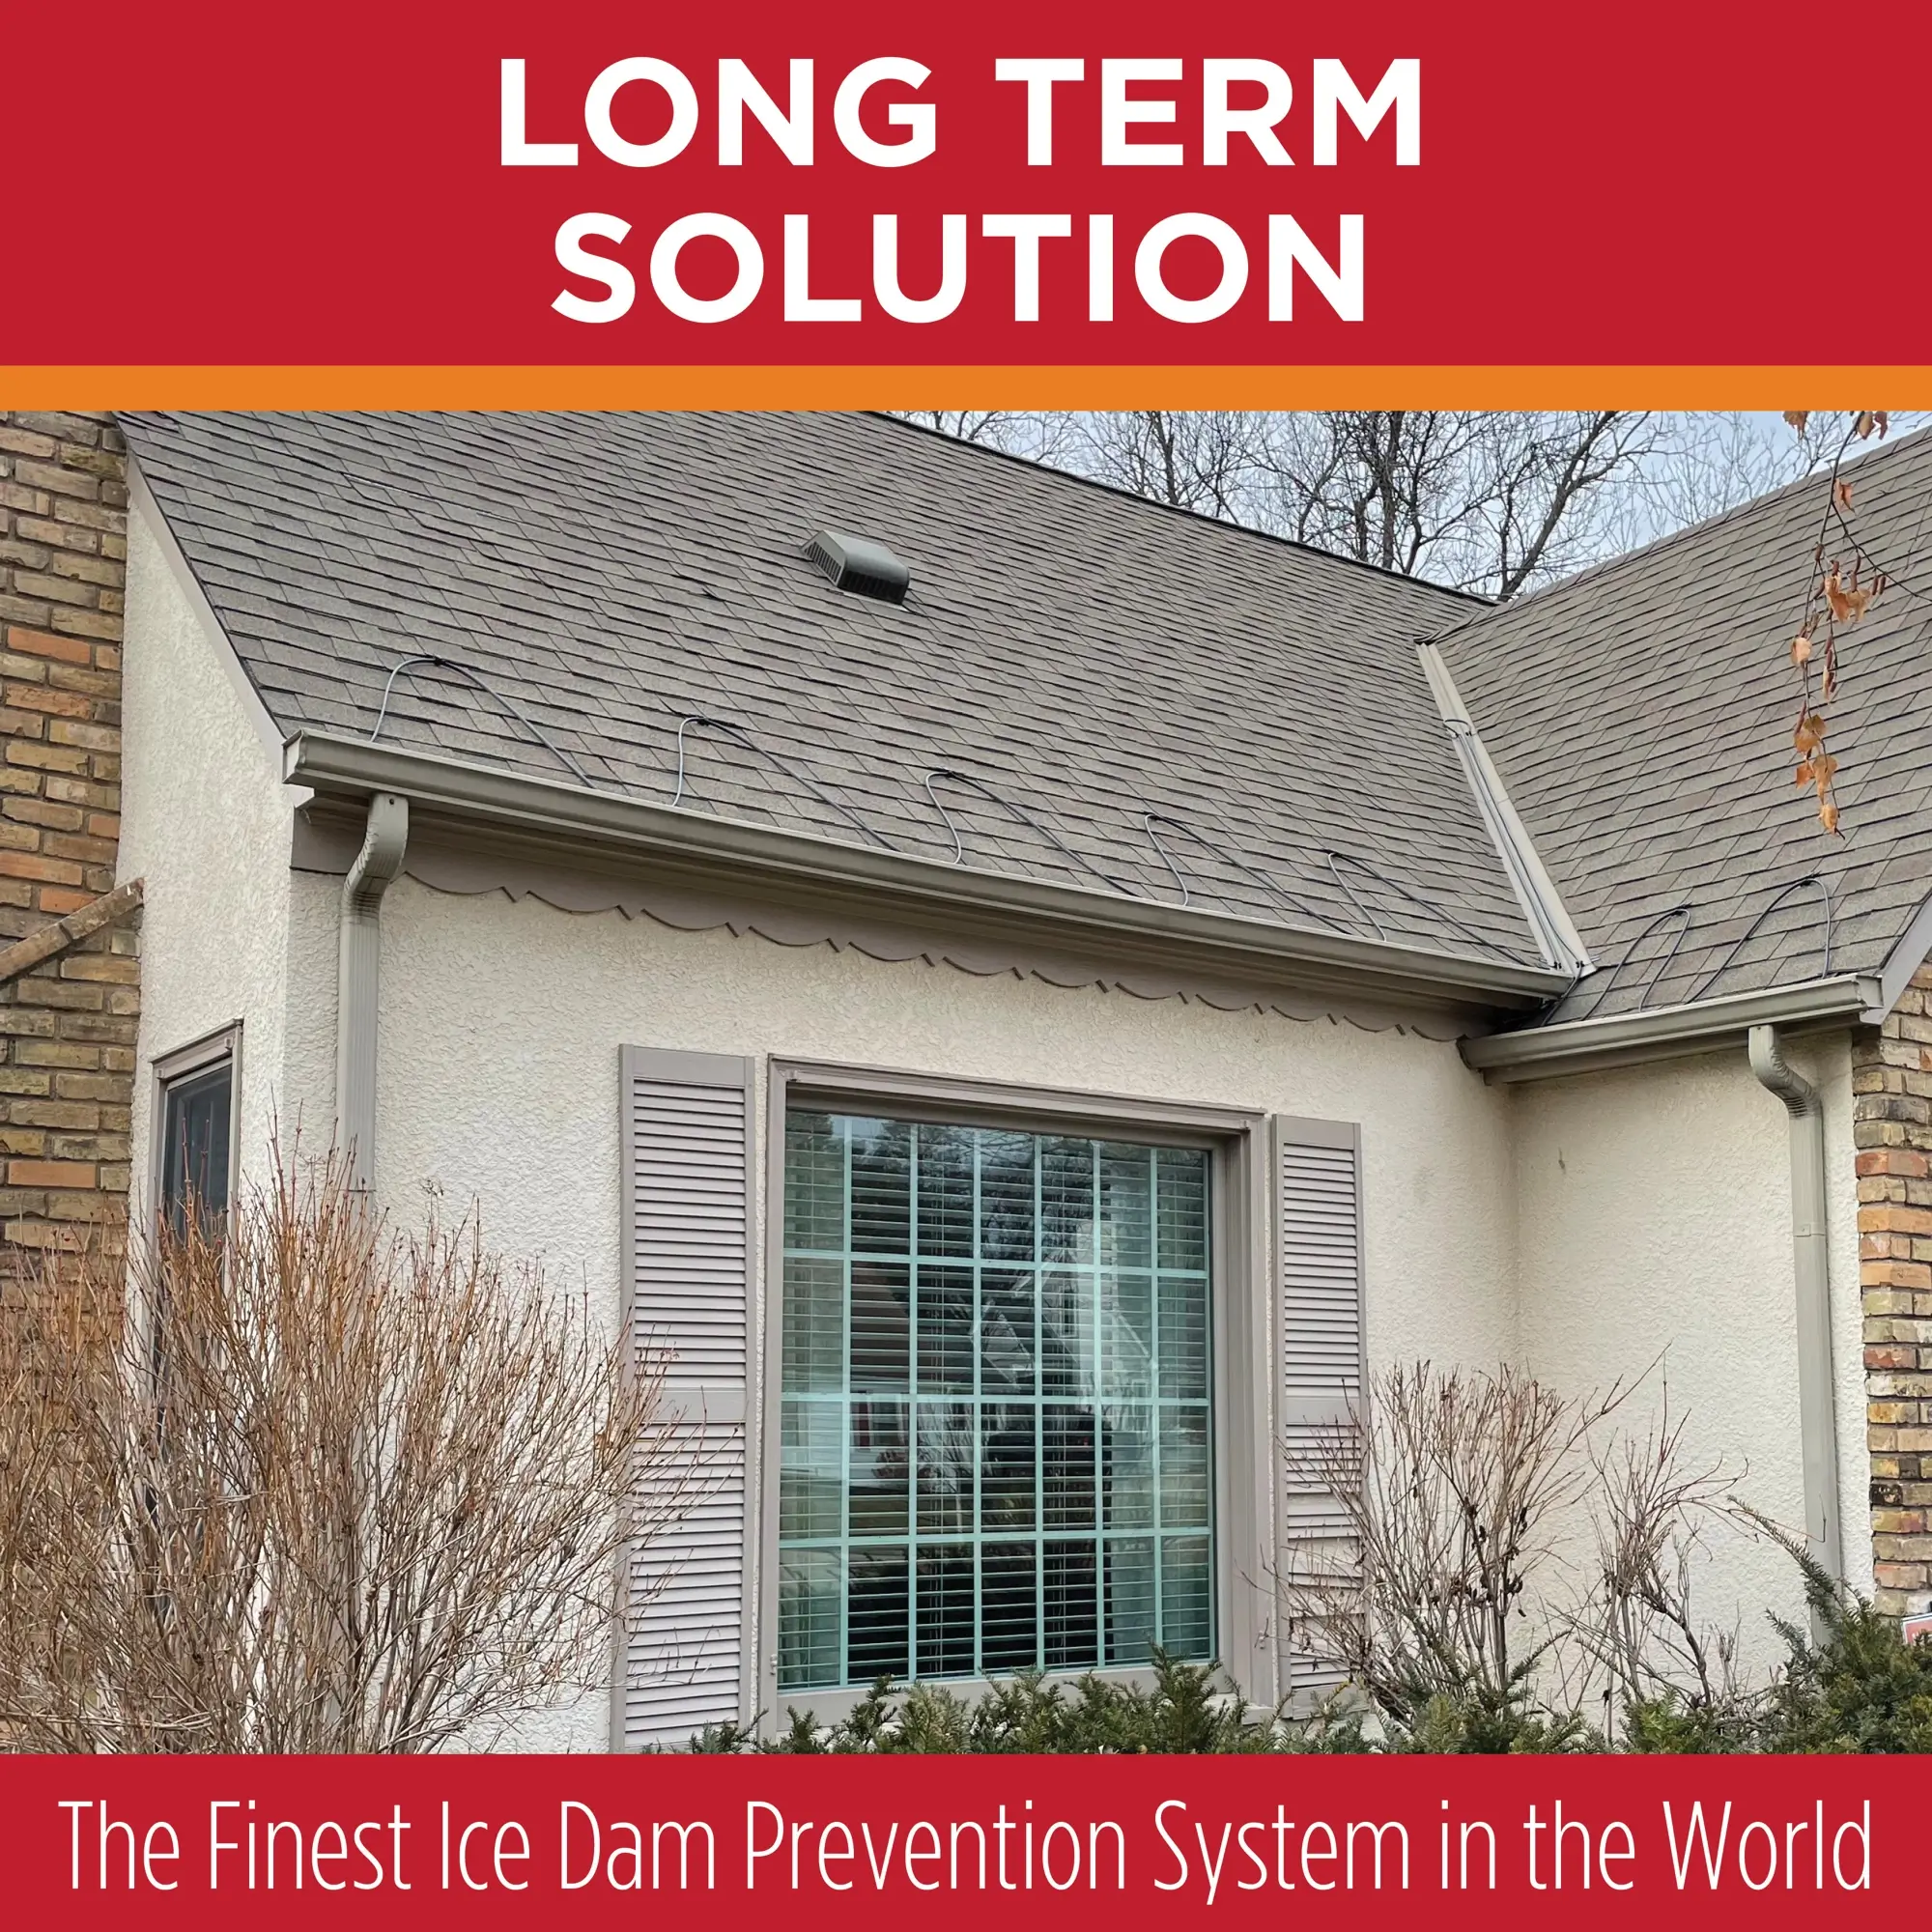
Plug-in Ready, Heavy-duty self-regulating ice dam heat tape for use in controlling ice dam build-up on roofs and in gutters. This heat tape is the highest-quality, most effective ice dam heat tape on the market, with a 10-Year Warranty. It will save you money in energy costs and cable replacement.
Radiant Solution’s Heat Tape PRO™ Self-Regulating Heat Cable is bad ass. You won’t find another self-regulating cable that can match our performance over the long run. Energy efficient, durable AF and designed with the user experience in mind, Heat Tape PRO™ is the last heat cable you will buy. Plug-in ready installation coupled with easy-to-ready instructions means installing Heat Tape PRO™ is a project for an DIYer.
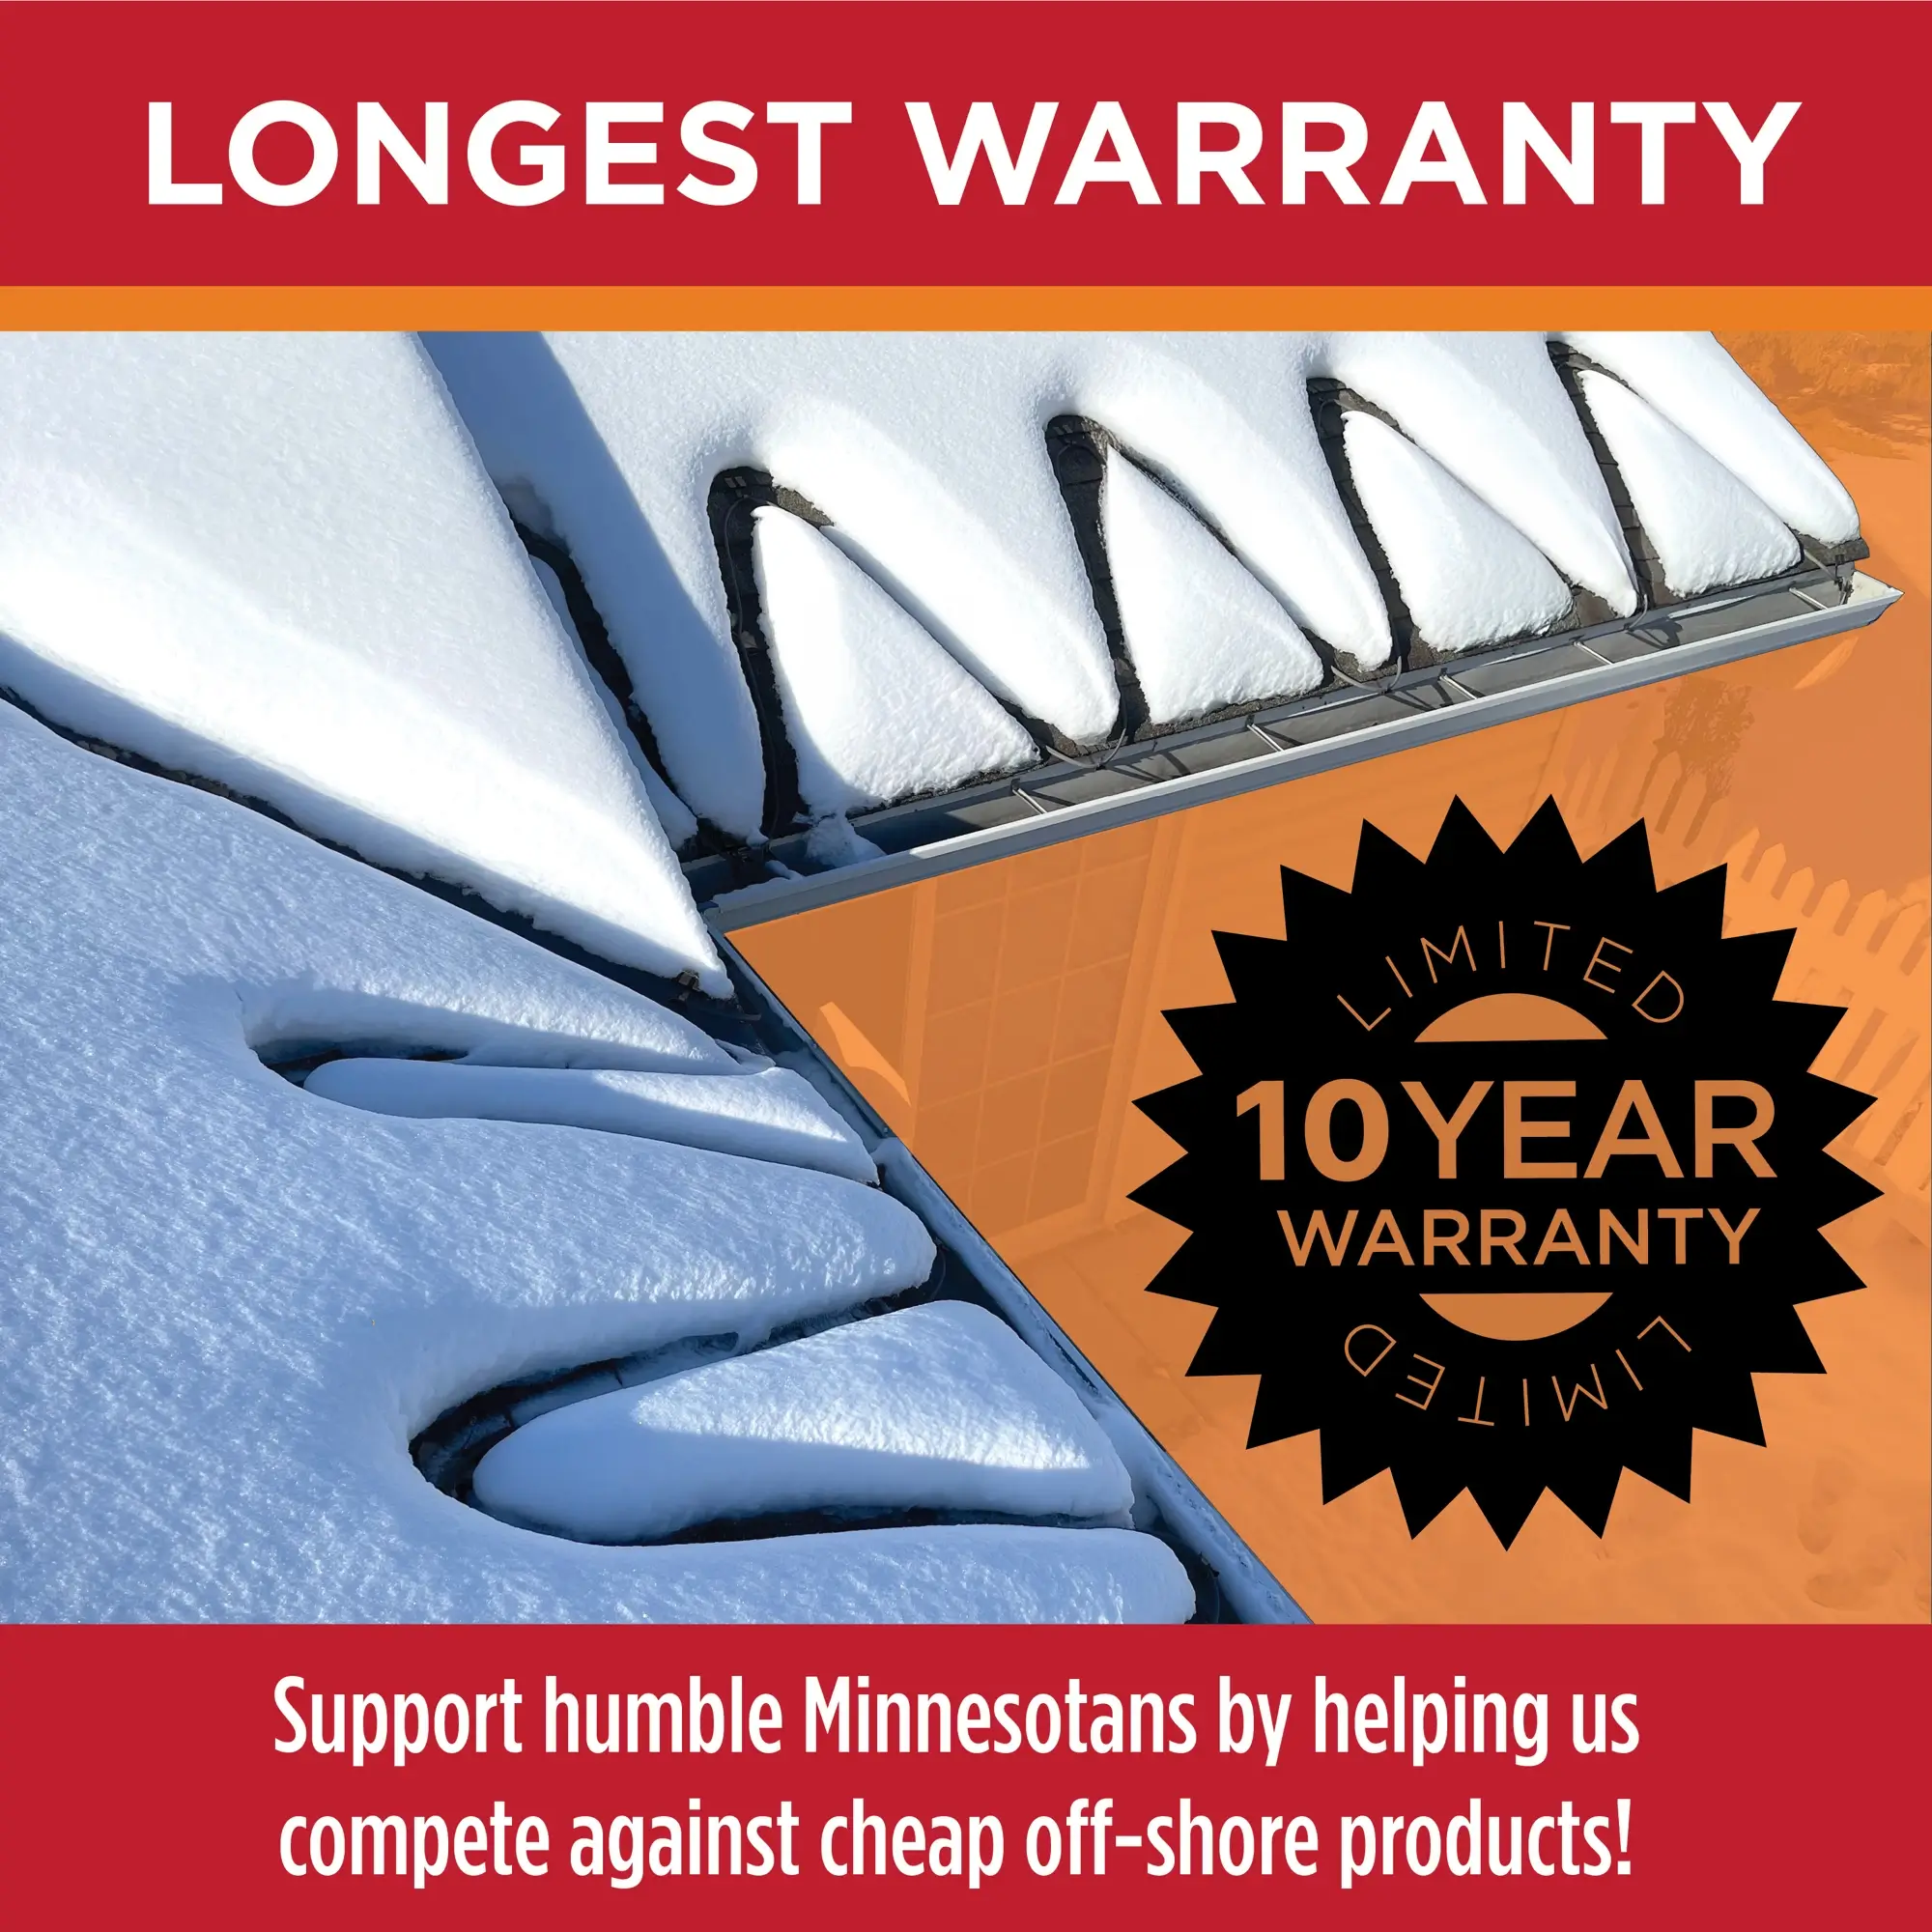
Backed by an unprecedented 10-Year Manufacturer’s Warranty.
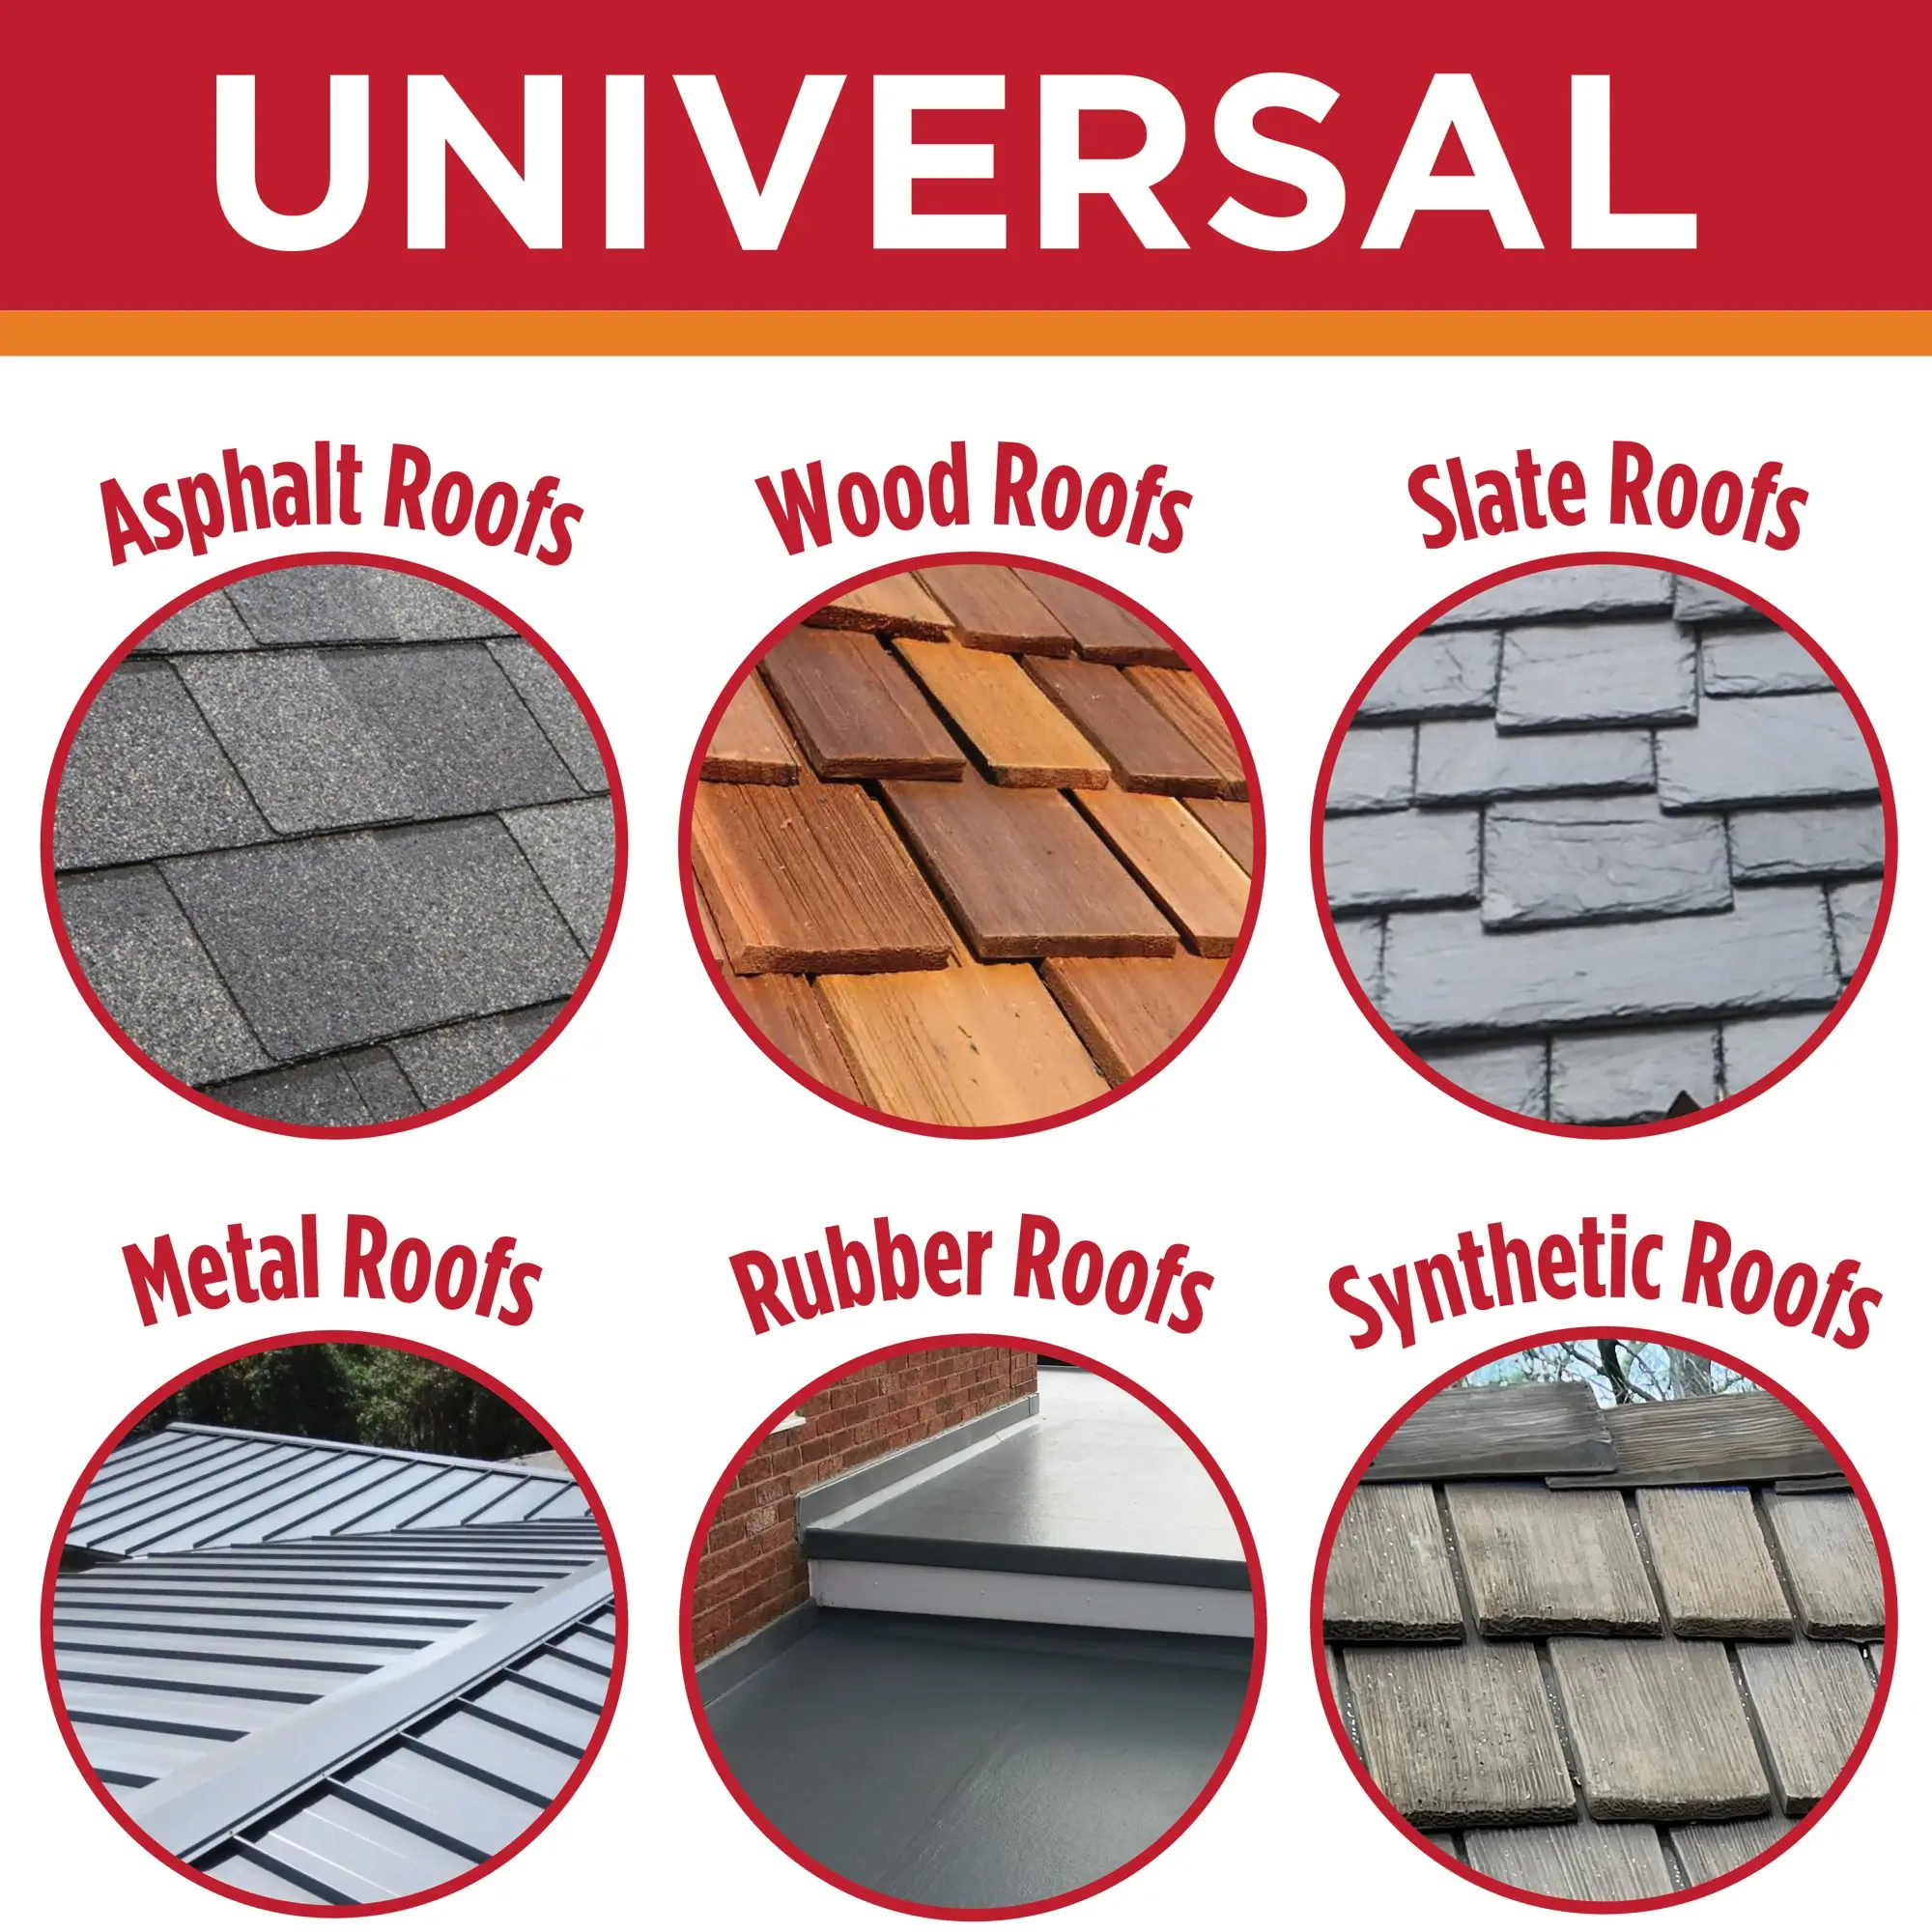
Heat Tape pro is designed to be used on all roof types, materials and styles. Click here to learn more on different roof-type usages. Don’t know what type of Roof you have? Click Here. Heat Tape Pro is designed to be used in gutters and downspouts. For More information on using Heat Tape Pro in Gutters, click here.
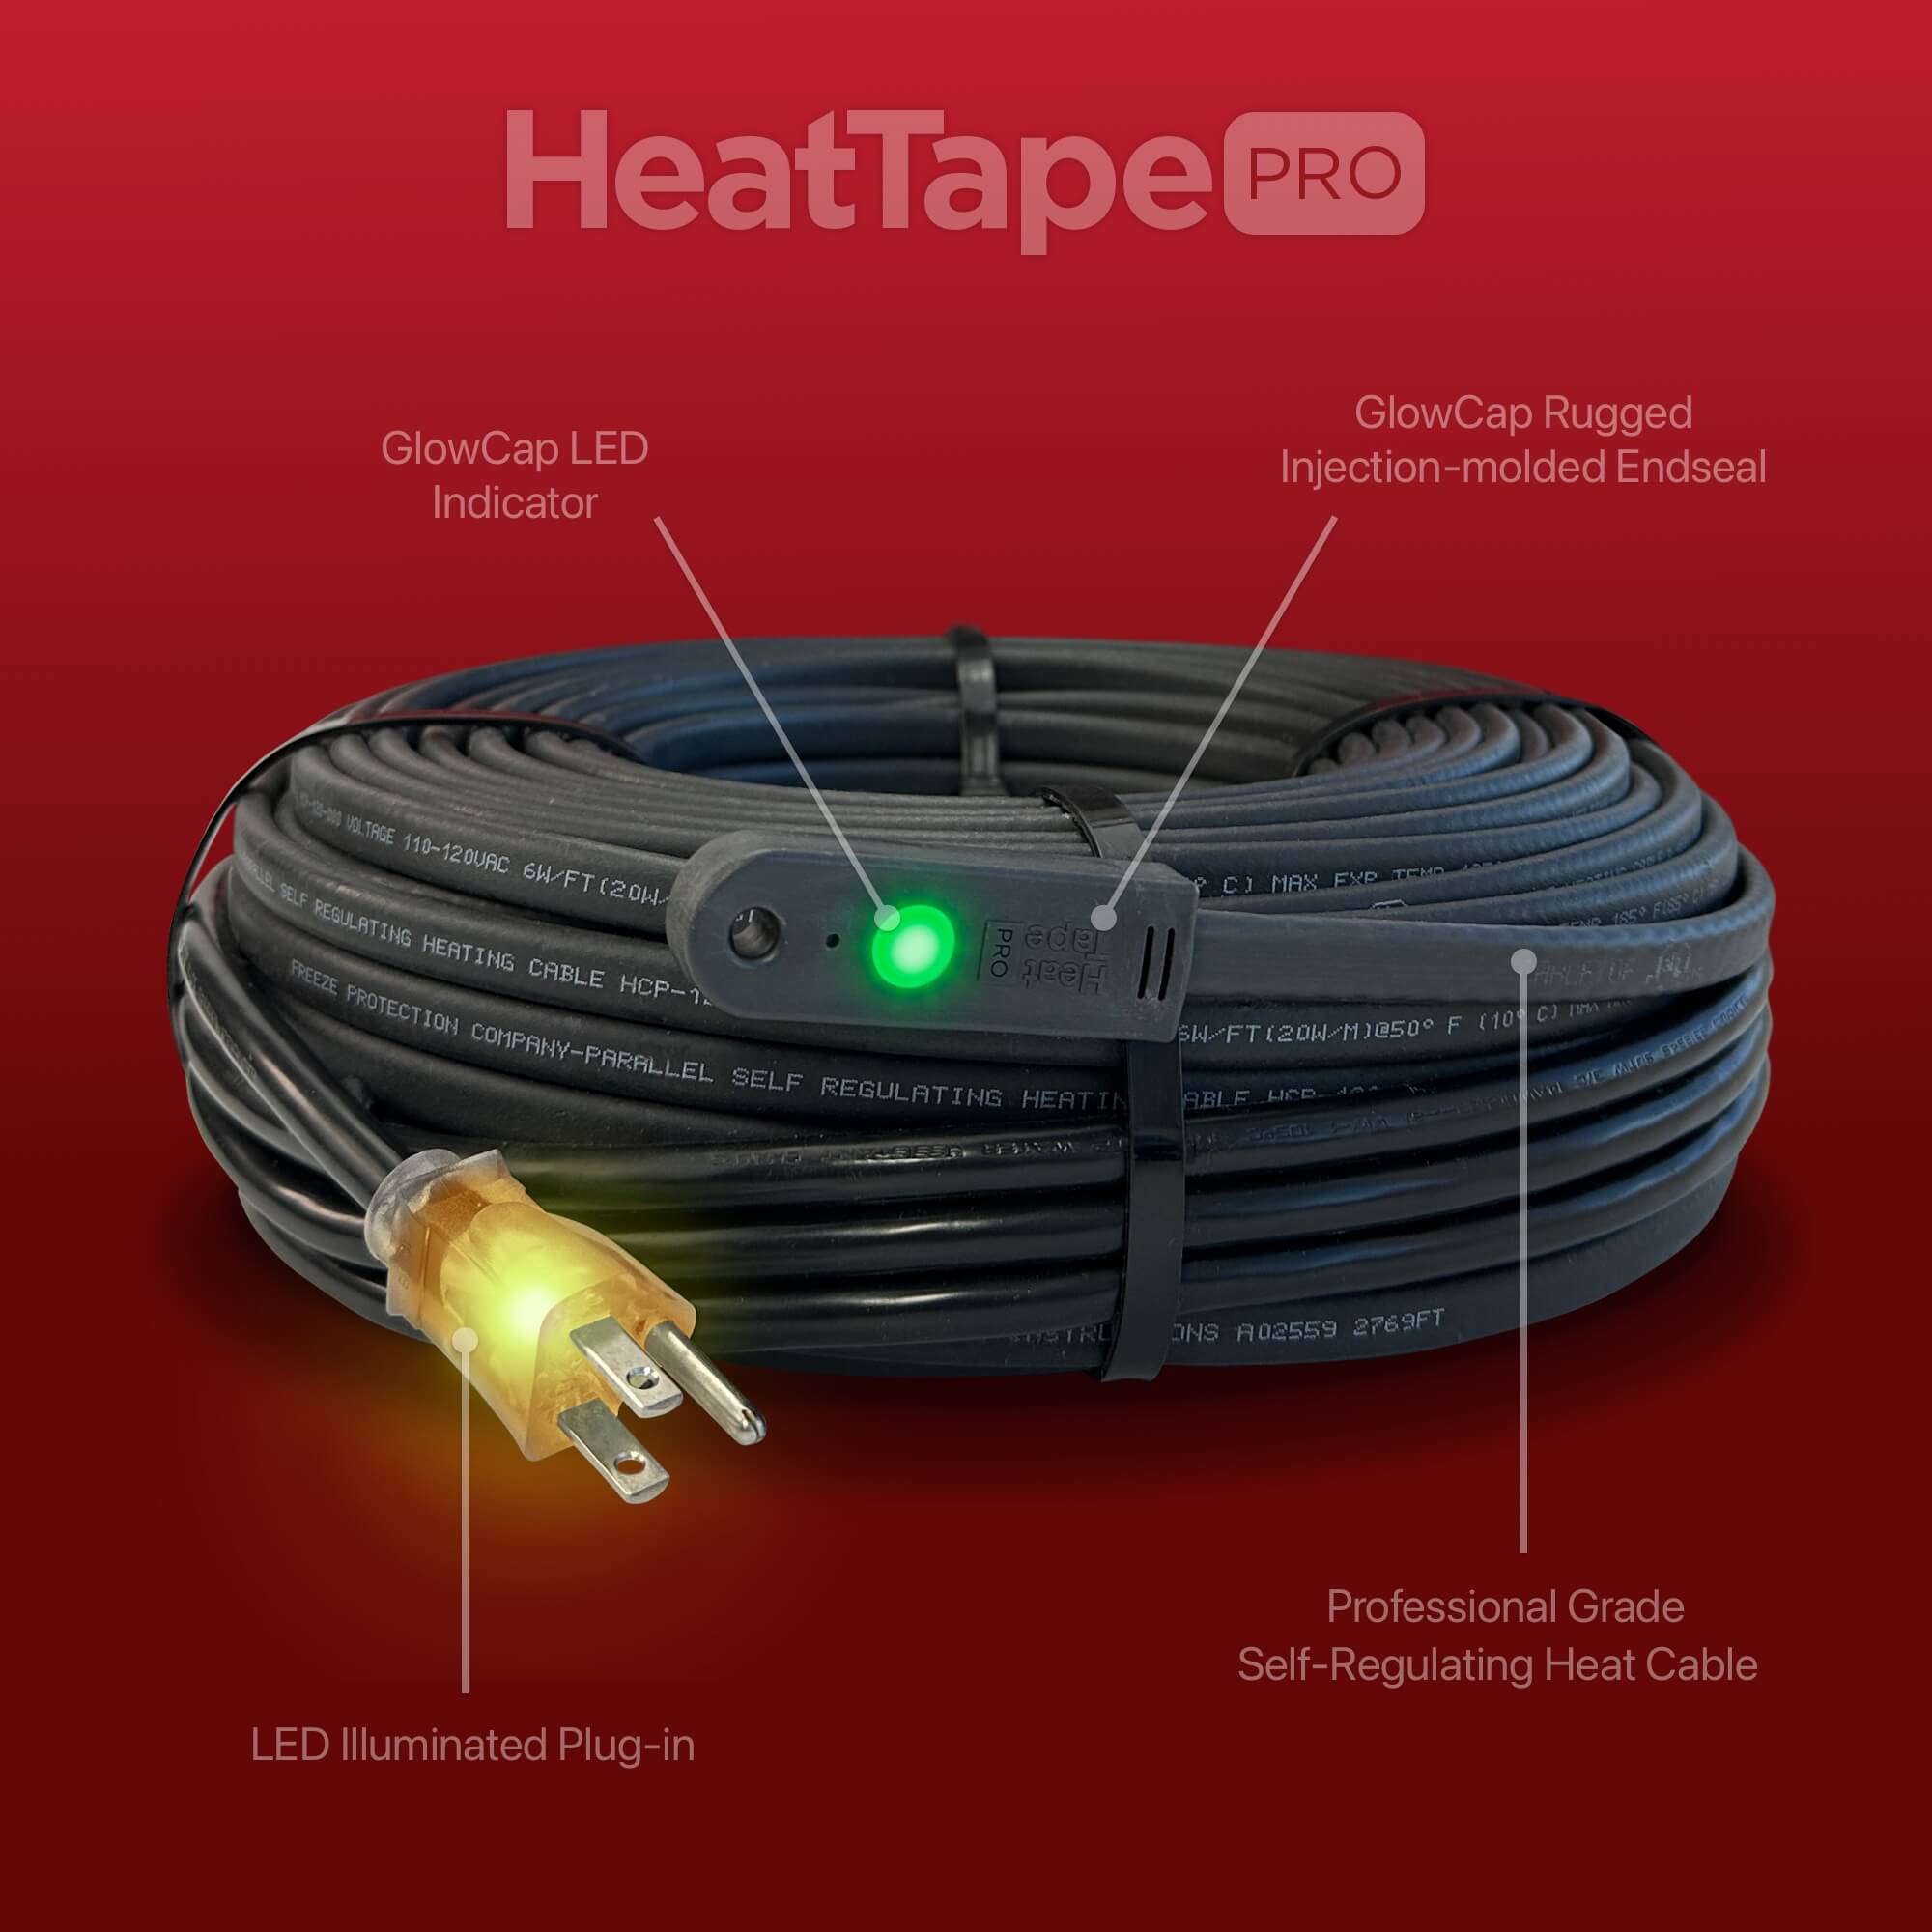
Pre-terminated, Plug-in Heat Tape lengths are available from 6-Feet – 150-feet of heated Length – The 10-foot power cord included will every Heat Tape Pro is in addition to the purchased length. So a 100-foot heat tape will have an actual length of 110 feet when the unheated cord is included.
| Outer Jacket: | UV-Resistant TPE |
|---|---|
| Cable Dimensions: | 6mm x 12mm |
| Wattage: | 6w/ft @ 50ºF (9.6w/ft @ 32º or lower) |
| Voltage: | 120 volts |
For a downloadable PDF of the product manual containing detailed specifications, installation instructions, product tips and more, click below.
The cost depends on four things: The length of cable you install, the watts per foot of that cable, the outdoor temperatures and how many hours per day it runs. The formula is simple: Cost = Cable length in feet × watts per foot ÷ 1000 × hours of operation × your electricity rate. Heat Tape Pro is a self-regulating roof and gutter de-icing cable, which means it adjusts its output based on temperature. At 50°F, it draws about 6 watts per foot, at 32°F, it’s around 5 watts per foot and in deep cold it draws closer to 8-9 watts per foot. Let’s do some basic math on a 75 foot de-icing cable running 24 hours a day in 25ºF. At $17.47/kWh (current national average) this cable will add about $1.85 per day to your bill. Not bad when compared to the cost of a roof leak.
Measure the roof edge where ice dams form, plus any gutters and downspouts you want to keep clear. Our Heat Tape Calculator will tell you exactly how much cable and how many clips you’ll need.
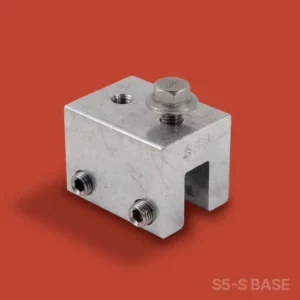
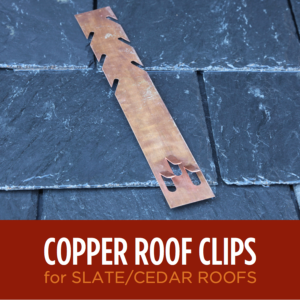
Yes. Heat Tape Pro works on asphalt shingles, metal, cedar shake, slate, Spanish tile, synthetic roofing and flat or low-slope roofs. The only difference is which clip or accessory you use to secure it. We make roof-safe attachment options for every surface.
Our self-regulating heat cable runs between 60–85°F. That’s warm enough to melt paths through ice and snow, but much safer than constant-wattage cables sold in big box stores that can overheat.
Yes. Heat Tape Pro is self-regulating and safe to overlap. It won’t short out or create a fire hazard if overlapped, unlike constant-wattage cables
Heat Tape Pro carries a 10-year manufacturer’s warranty, the longest in the industry. Many competitors top out at 2–3 years.
No. The cable adjusts output based on temperature. It uses more power when it’s cold, less when it’s warmer. To fully turn the system on and off automatically, add our ThermaCord controller. It saves energy and handles the switching for you.
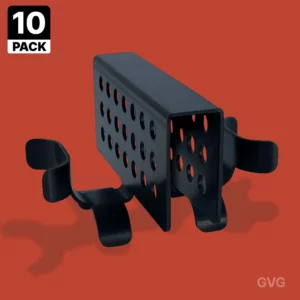
Yes. About half of our customers install Heat Tape Pro Plug-in ready cables on their own. It’s pretty easy work. Our patented Grip Clip system makes it easy to secure the cable without putting nails through your roof. Grip Clips are sold separately.
At minimum, you’ll need the right heat tape roof clips for your roof material. We make more than 20 clip types for different roof styles. Other popular add-ons include Cable Guard for extra protection in vulnerable areas and the ThermaCord controller for automatic operation.
Heat Tape Pro is designed to last decades when installed correctly. If it ever gets damaged it can be repaired in the field with our kits.
Yes. Heat Tape Pro is designed to run through gutters and downspouts to keep water flowing and prevent ice from blocking drainage. Always pull the cable through to the very end of the downspout so meltwater has a clear path out.
No. Heat Tape Pro doesn’t clear your whole roof (nor do you want that). It creates melted pathways so water can drain off the roof instead of backing up into your house. It solves the problem by controlling where the ice forms, not by removing all snow.
No. When installed with the correct clips it Heat Tape Pro WILL NOT harm your roof. Remember, Heat Tape Pro doesn’t get hotter than your forehead so it’s quite safe in terms of being in contact with any material on your home.
No. Leave it installed year-round. Just unplug it when winter is over. The cable is UV-stable and built to withstand outdoor conditions.
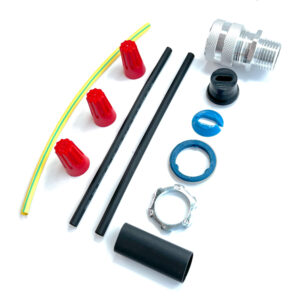
We do not recommend hardwiring our plug-in-ready heat cables. Instead buy our spool cable and connection kits that are designed specifically for this type of application.
Install before freezing temperatures arrive. Once ice dams have already formed it’s harder to run the cable where it needs to go. Early installation ensures your roof is protected from the first snow.
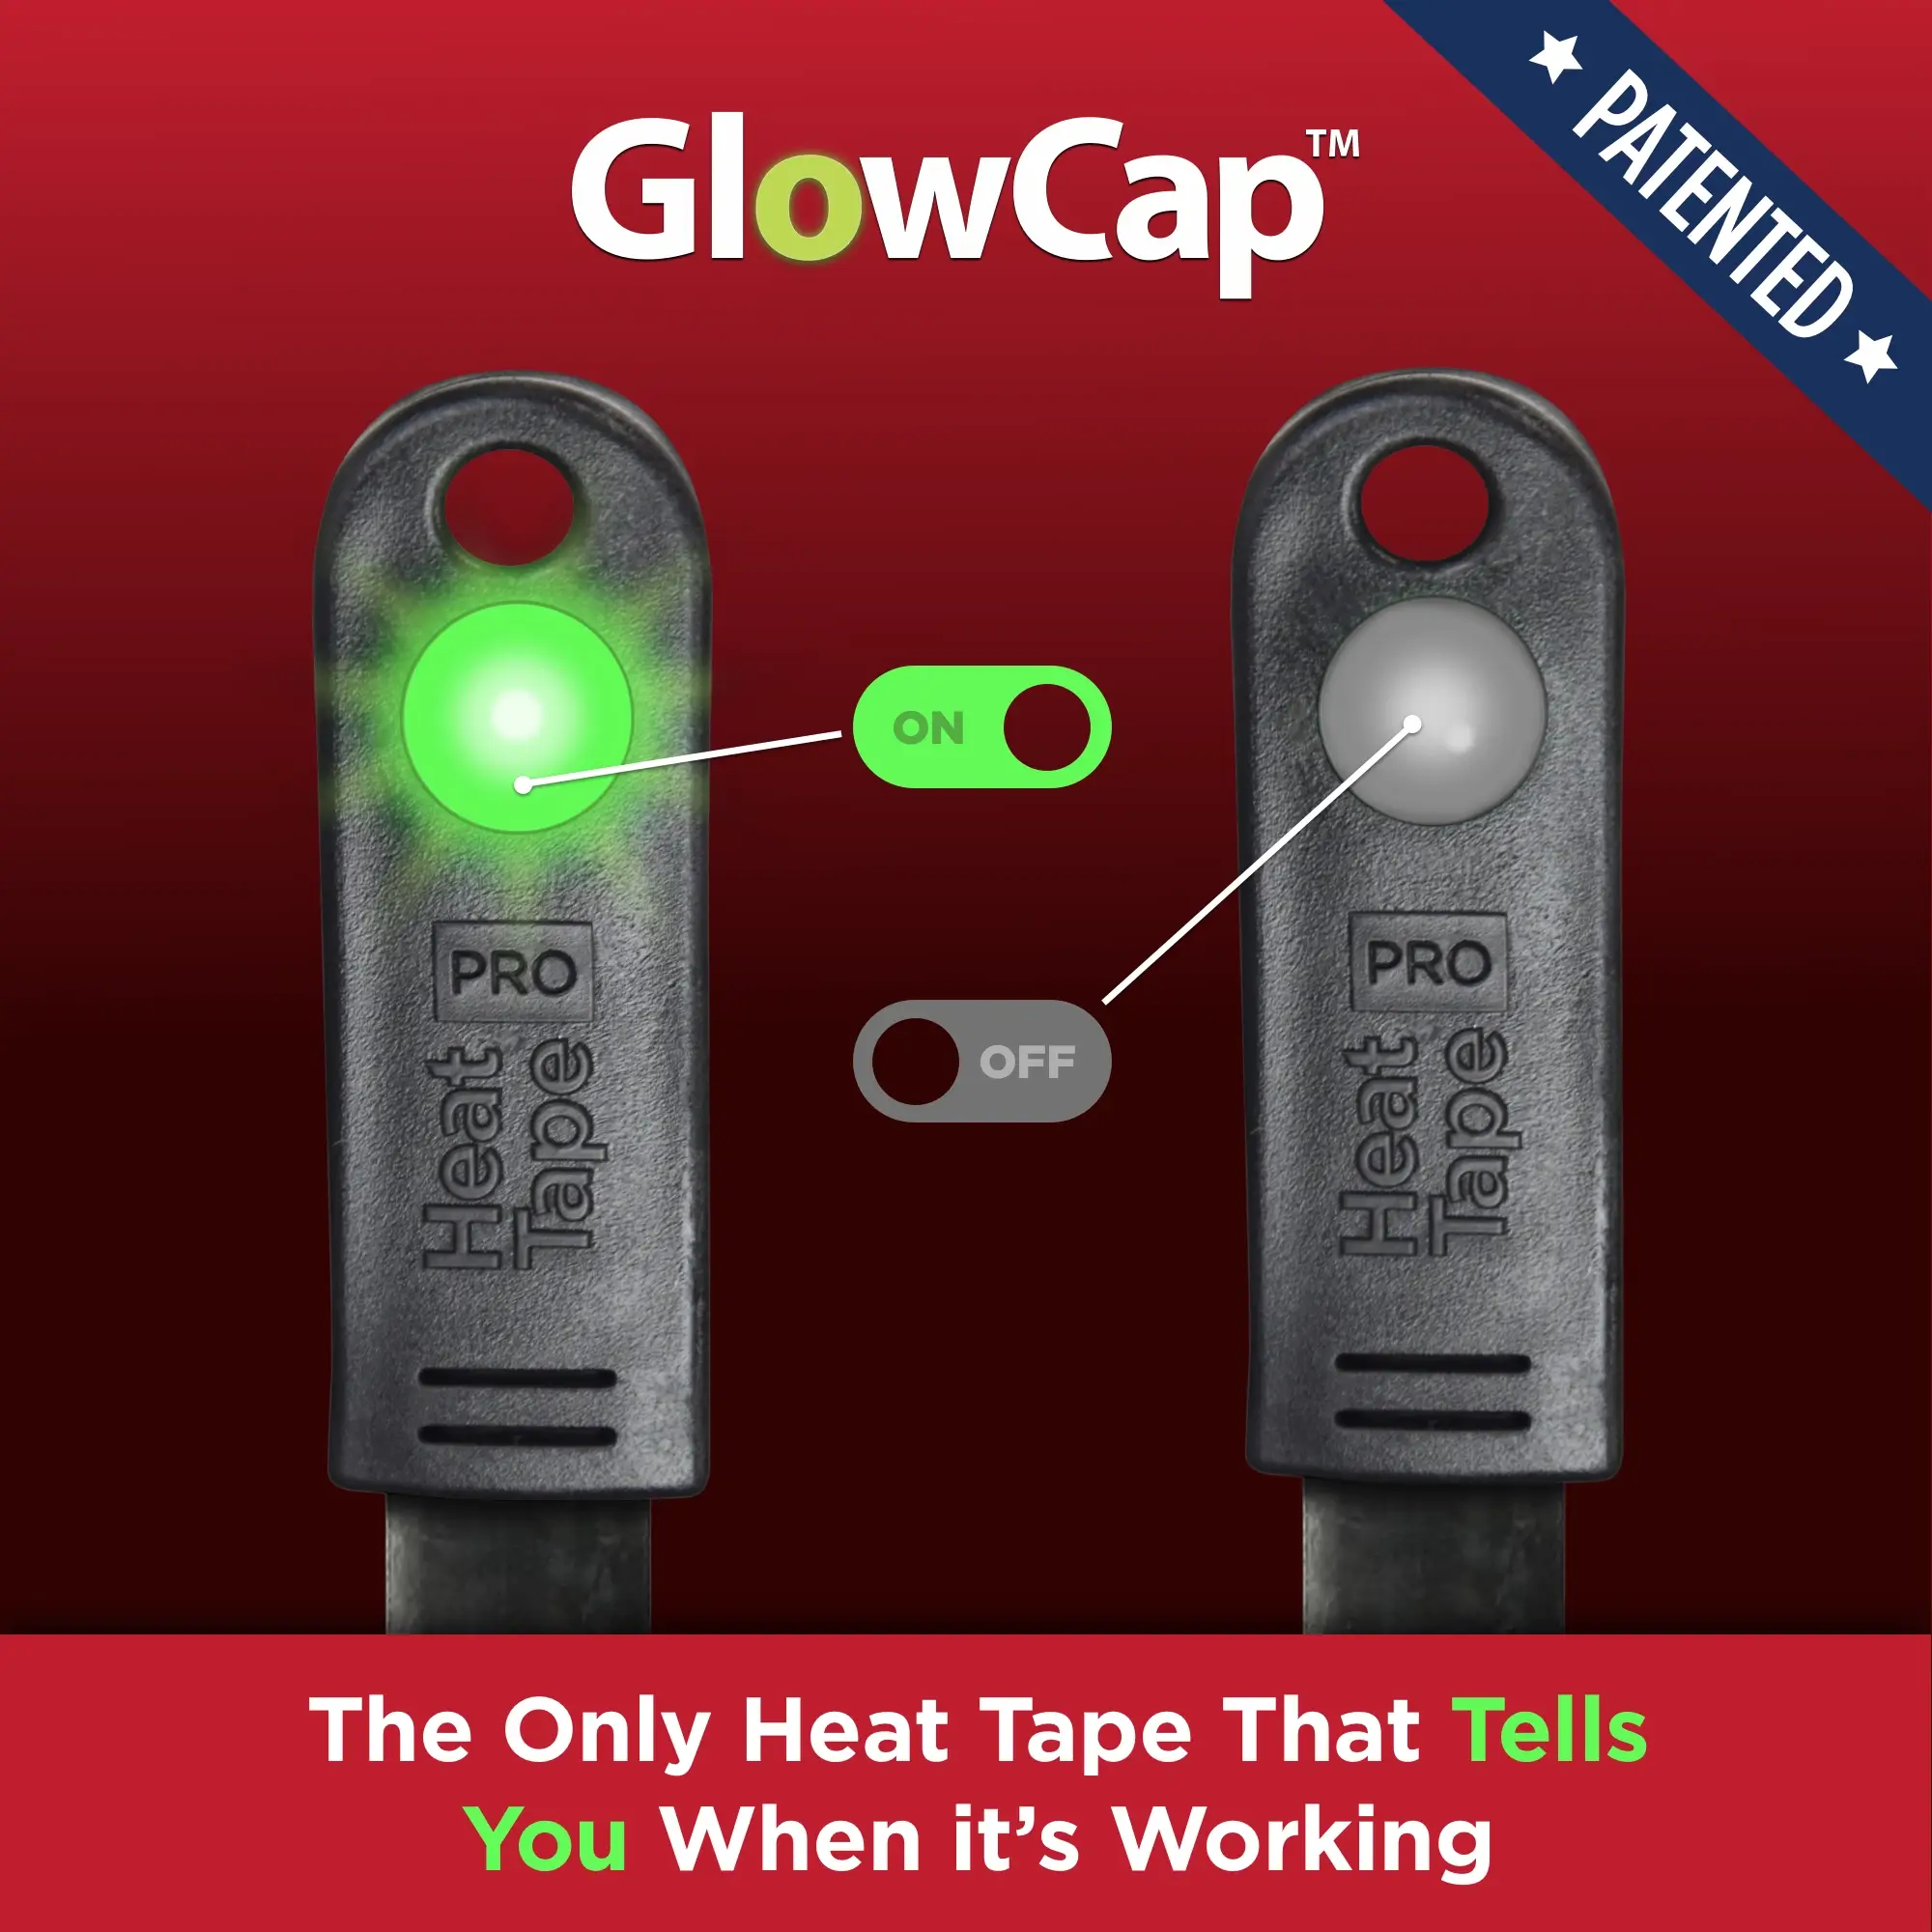
Look at the GlowCap on the end of the cable. If the green light is glowing, the system is energized and protecting your roof. Heat Tape Pro is the only cable with a built-in visual check. You can also feel the cable in freezing weather, it will be slightly warm.
Look at the GlowCap on the end of the cable. If the green light is glowing, the system is energized and protecting your roof. Heat Tape Pro is the only cable with a built-in visual check. You can also feel the cable in freezing weather, it will be slightly warm.
The answer is Heat Tape Pro. Our cable is featured as a top choice in a wide variety of lists and rankings due to it’s superior quality, length of warranty, features including the LED indicator on the end of the cable and the longest power cord available (10 feet). It’s the last heat cable you will need to buy.
We keep them in stock and ship same day from Minnesota, don’t ‘cha know (assuming you don’t order too late in the day!).
Easy. Click here to view the spec sheet.
Yes. As long as the cable is plugged in, it will be consuming power, however self-regulating roof de-icing cables like Heat Tape Pro adjust their power output based on outdoor temperature. They use more energy in colder conditions and less in milder weather. If paired with a controller like a ThermaCord, the system only runs when it’s cold enough to need protection.
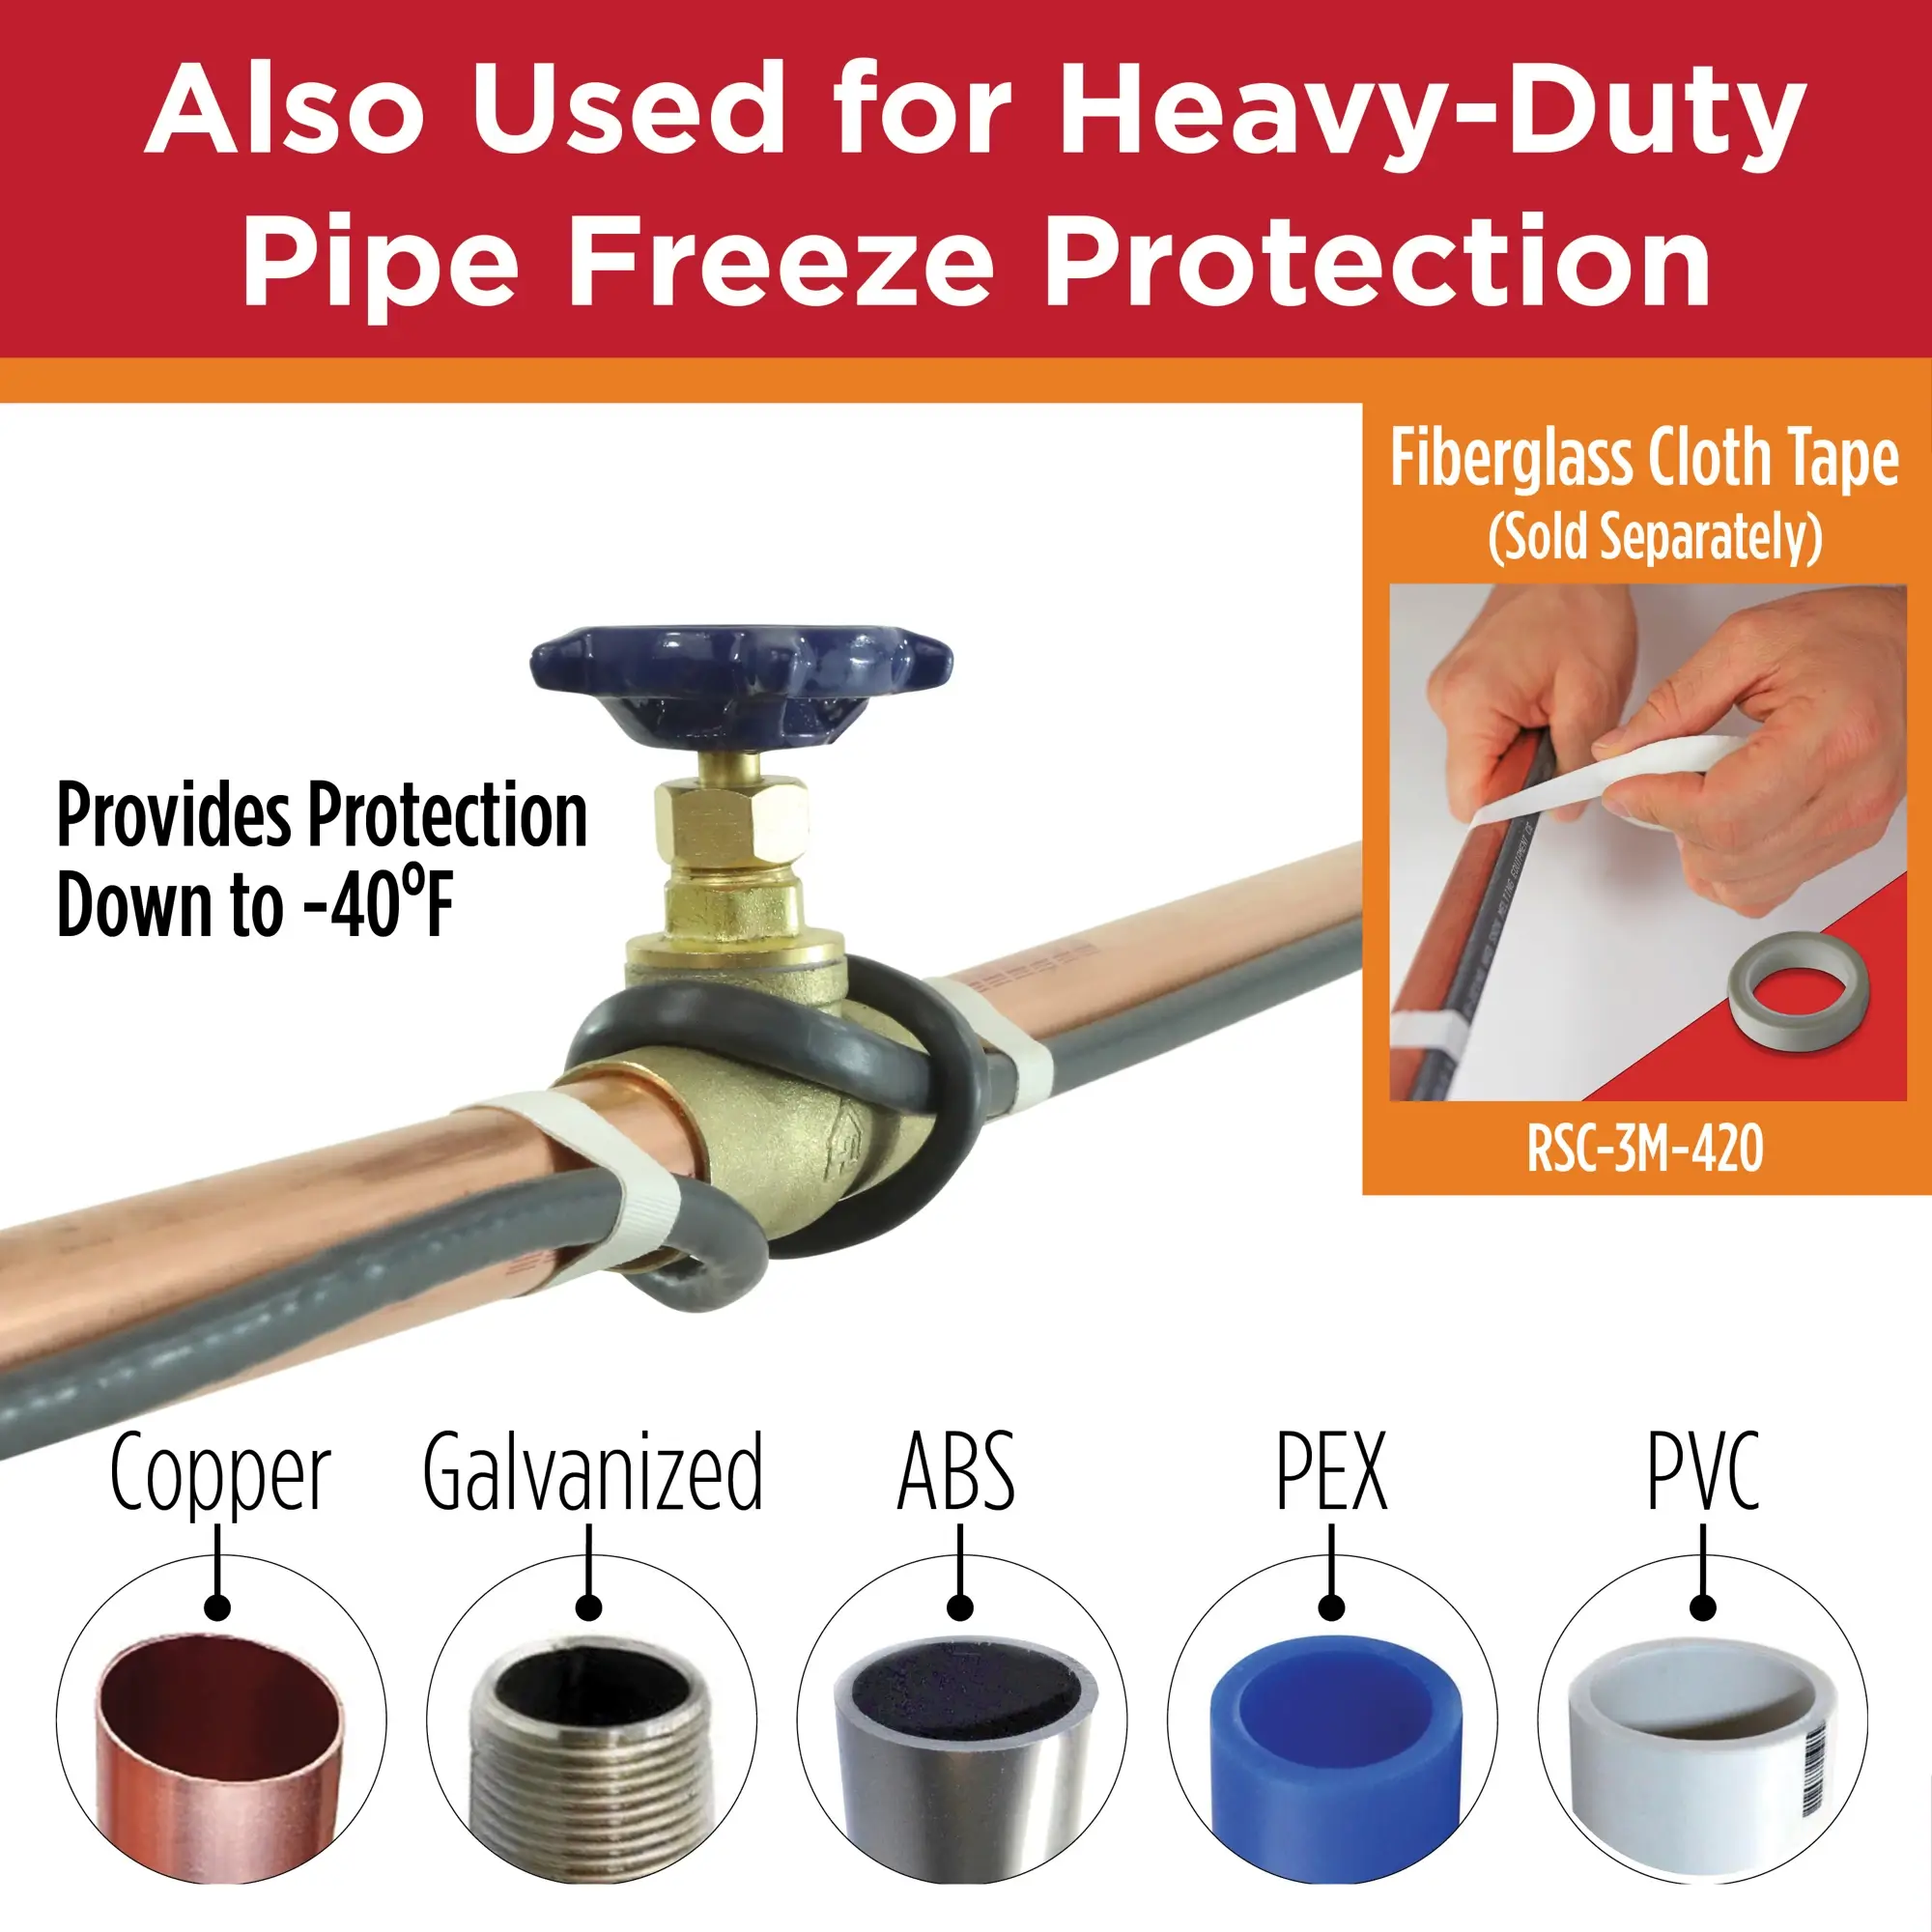
Yes. Heat Tape Pro is designed for roof edges, valleys, gutters, and downspouts. Running cable in valleys prevents ice buildup where meltwater naturally collects, and downspout coverage ensures water can escape the roof system without freezing.
If you're using cheap, constant wattage cable, such as what you might find in a big box store, the answer is it can start a fire or short out. Heat Tape Pro is self-regulating won’t overheat if it touches or overlaps, nor does it create a fire hazard.
We don’t recommend it, but if necessary use the shortest, heaviest-gauge (10-12 AWG) outdoor-rated cord you can find. Long or undersized extension cords can cause voltage drop and can overheat. To be clear, we're not recommending the use of extension cords, but we do recognize that people do it all the time so we would like to give guidance if that's a decision you make.
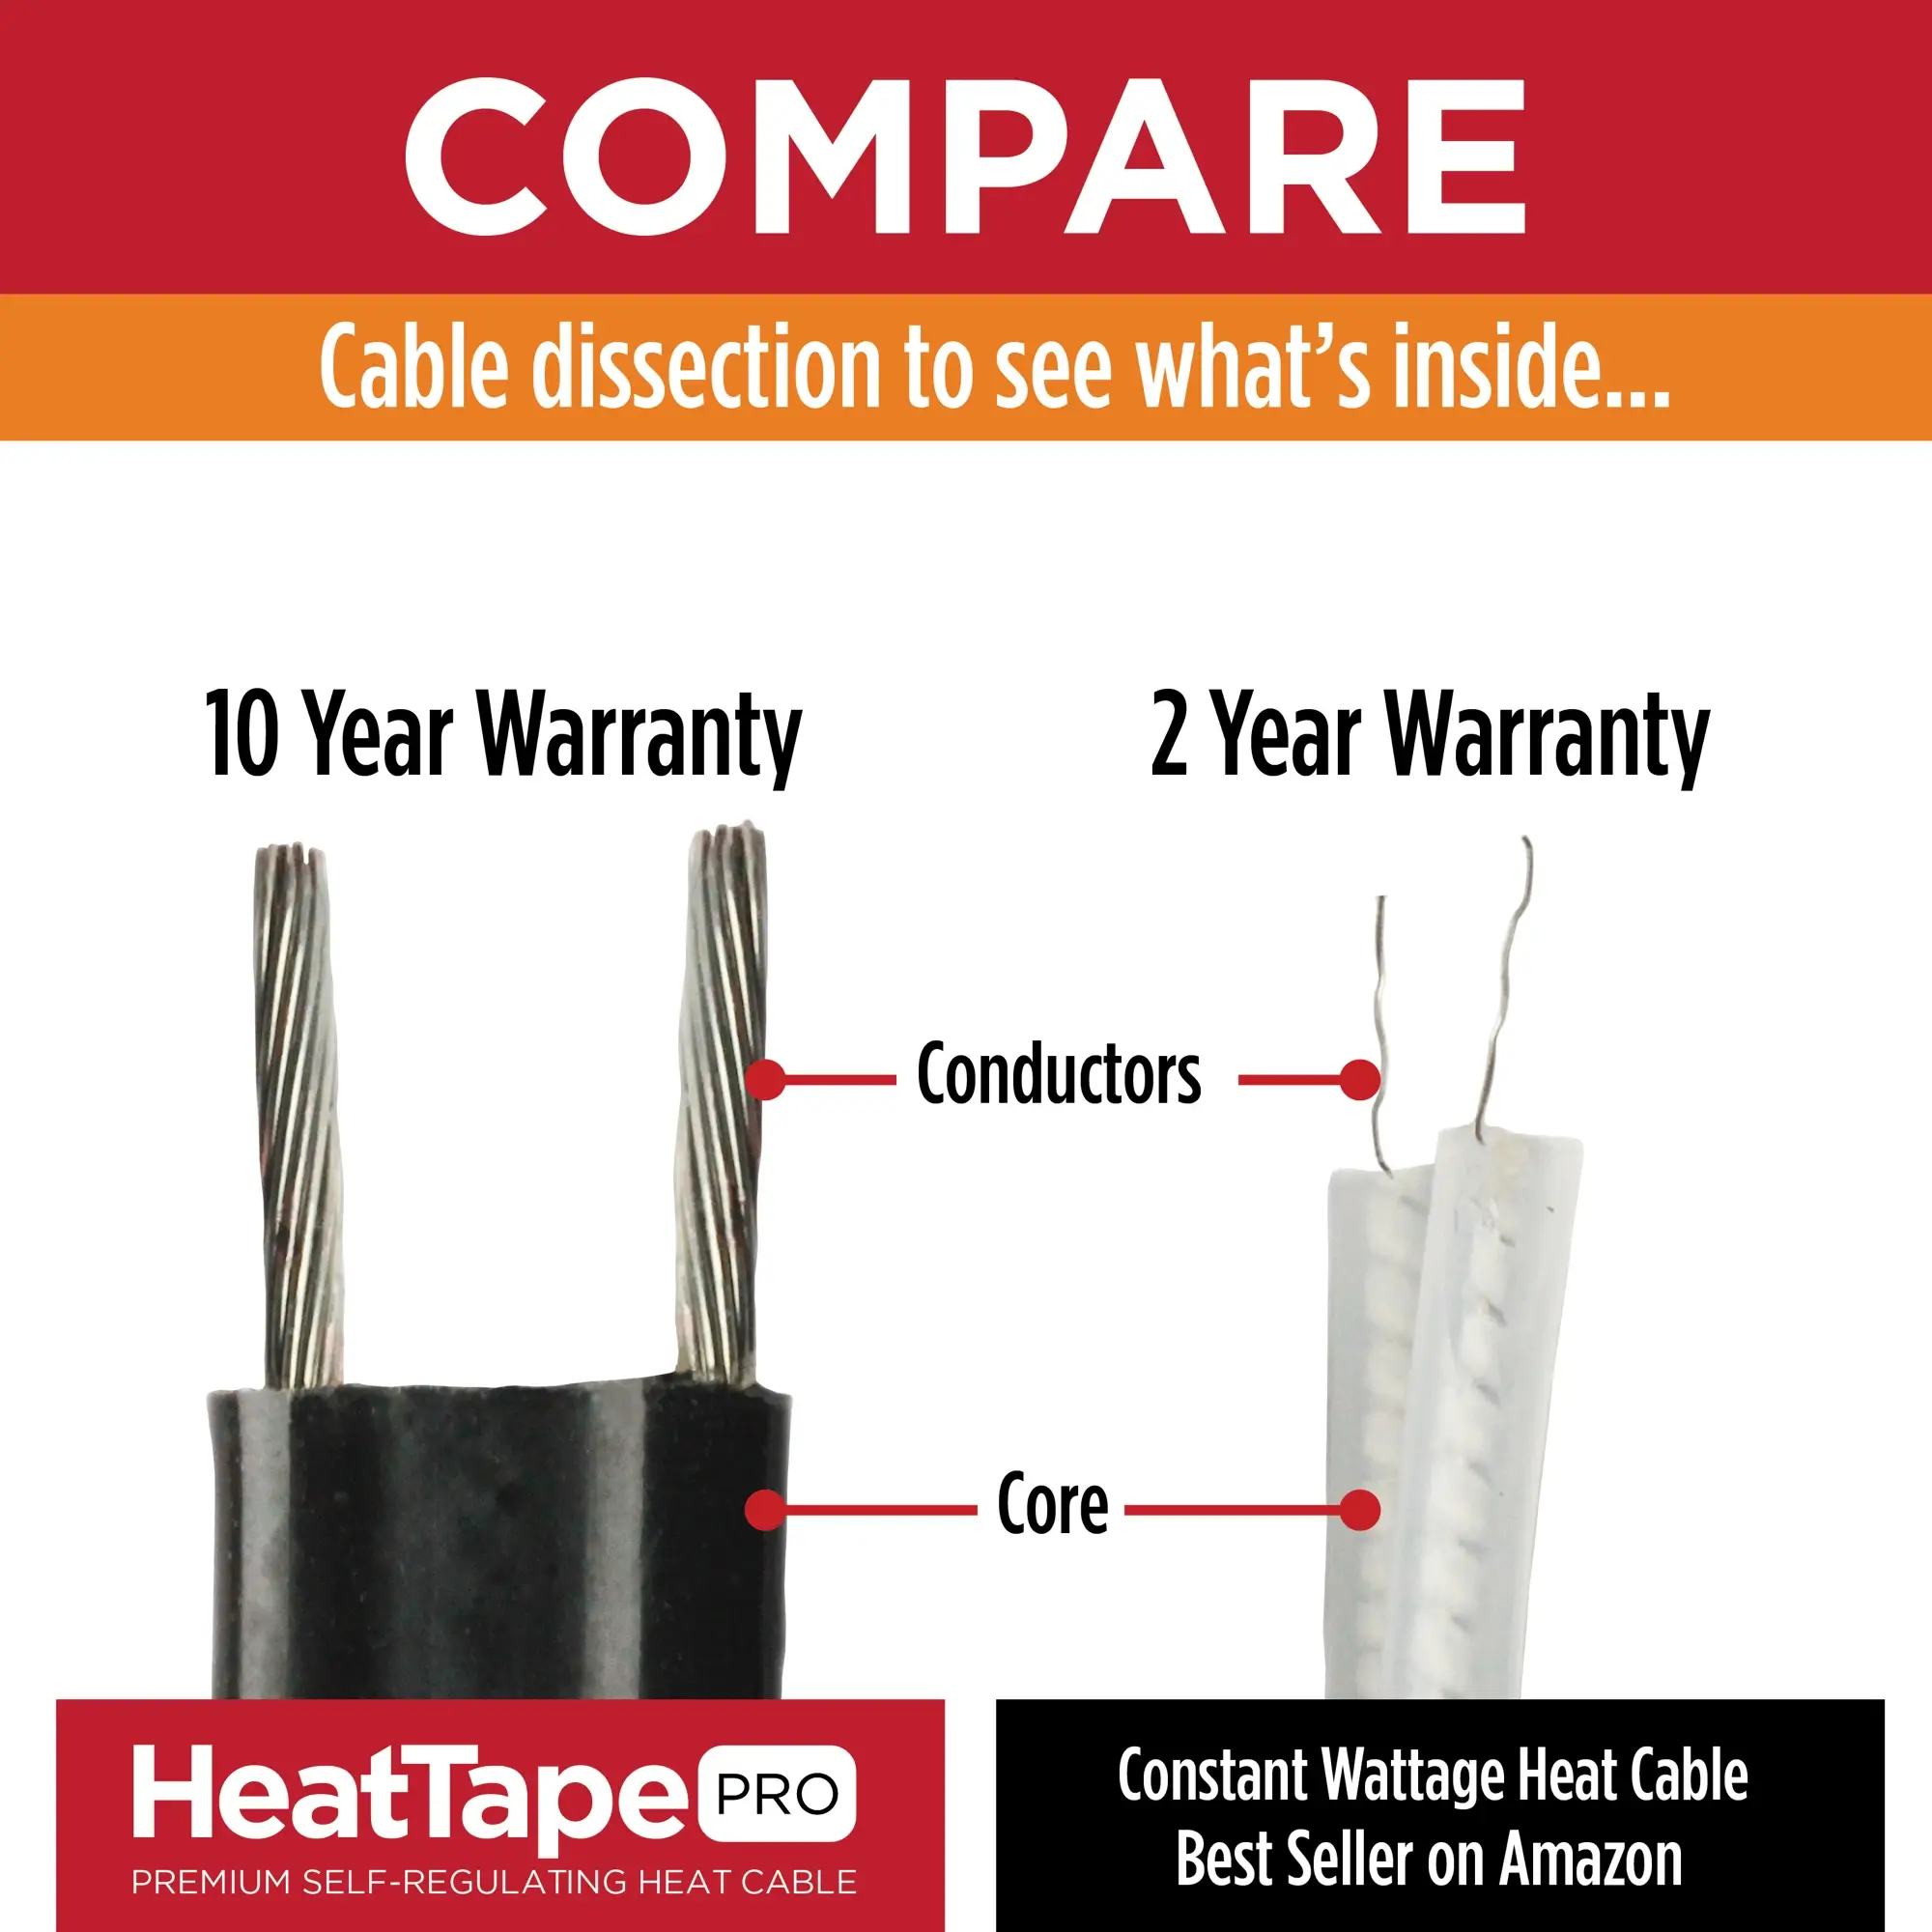
Constant wattage heat cable, such as what you buy at big box stores usually carry a one year warranty for a reason. They don't last long. With proper installation, Heat Tape Pro will last well over 10 years. It’s commercial-grade, UV-stable and field-repairable if damaged. We back it with a 10-year warranty but most systems outlast that by many years.
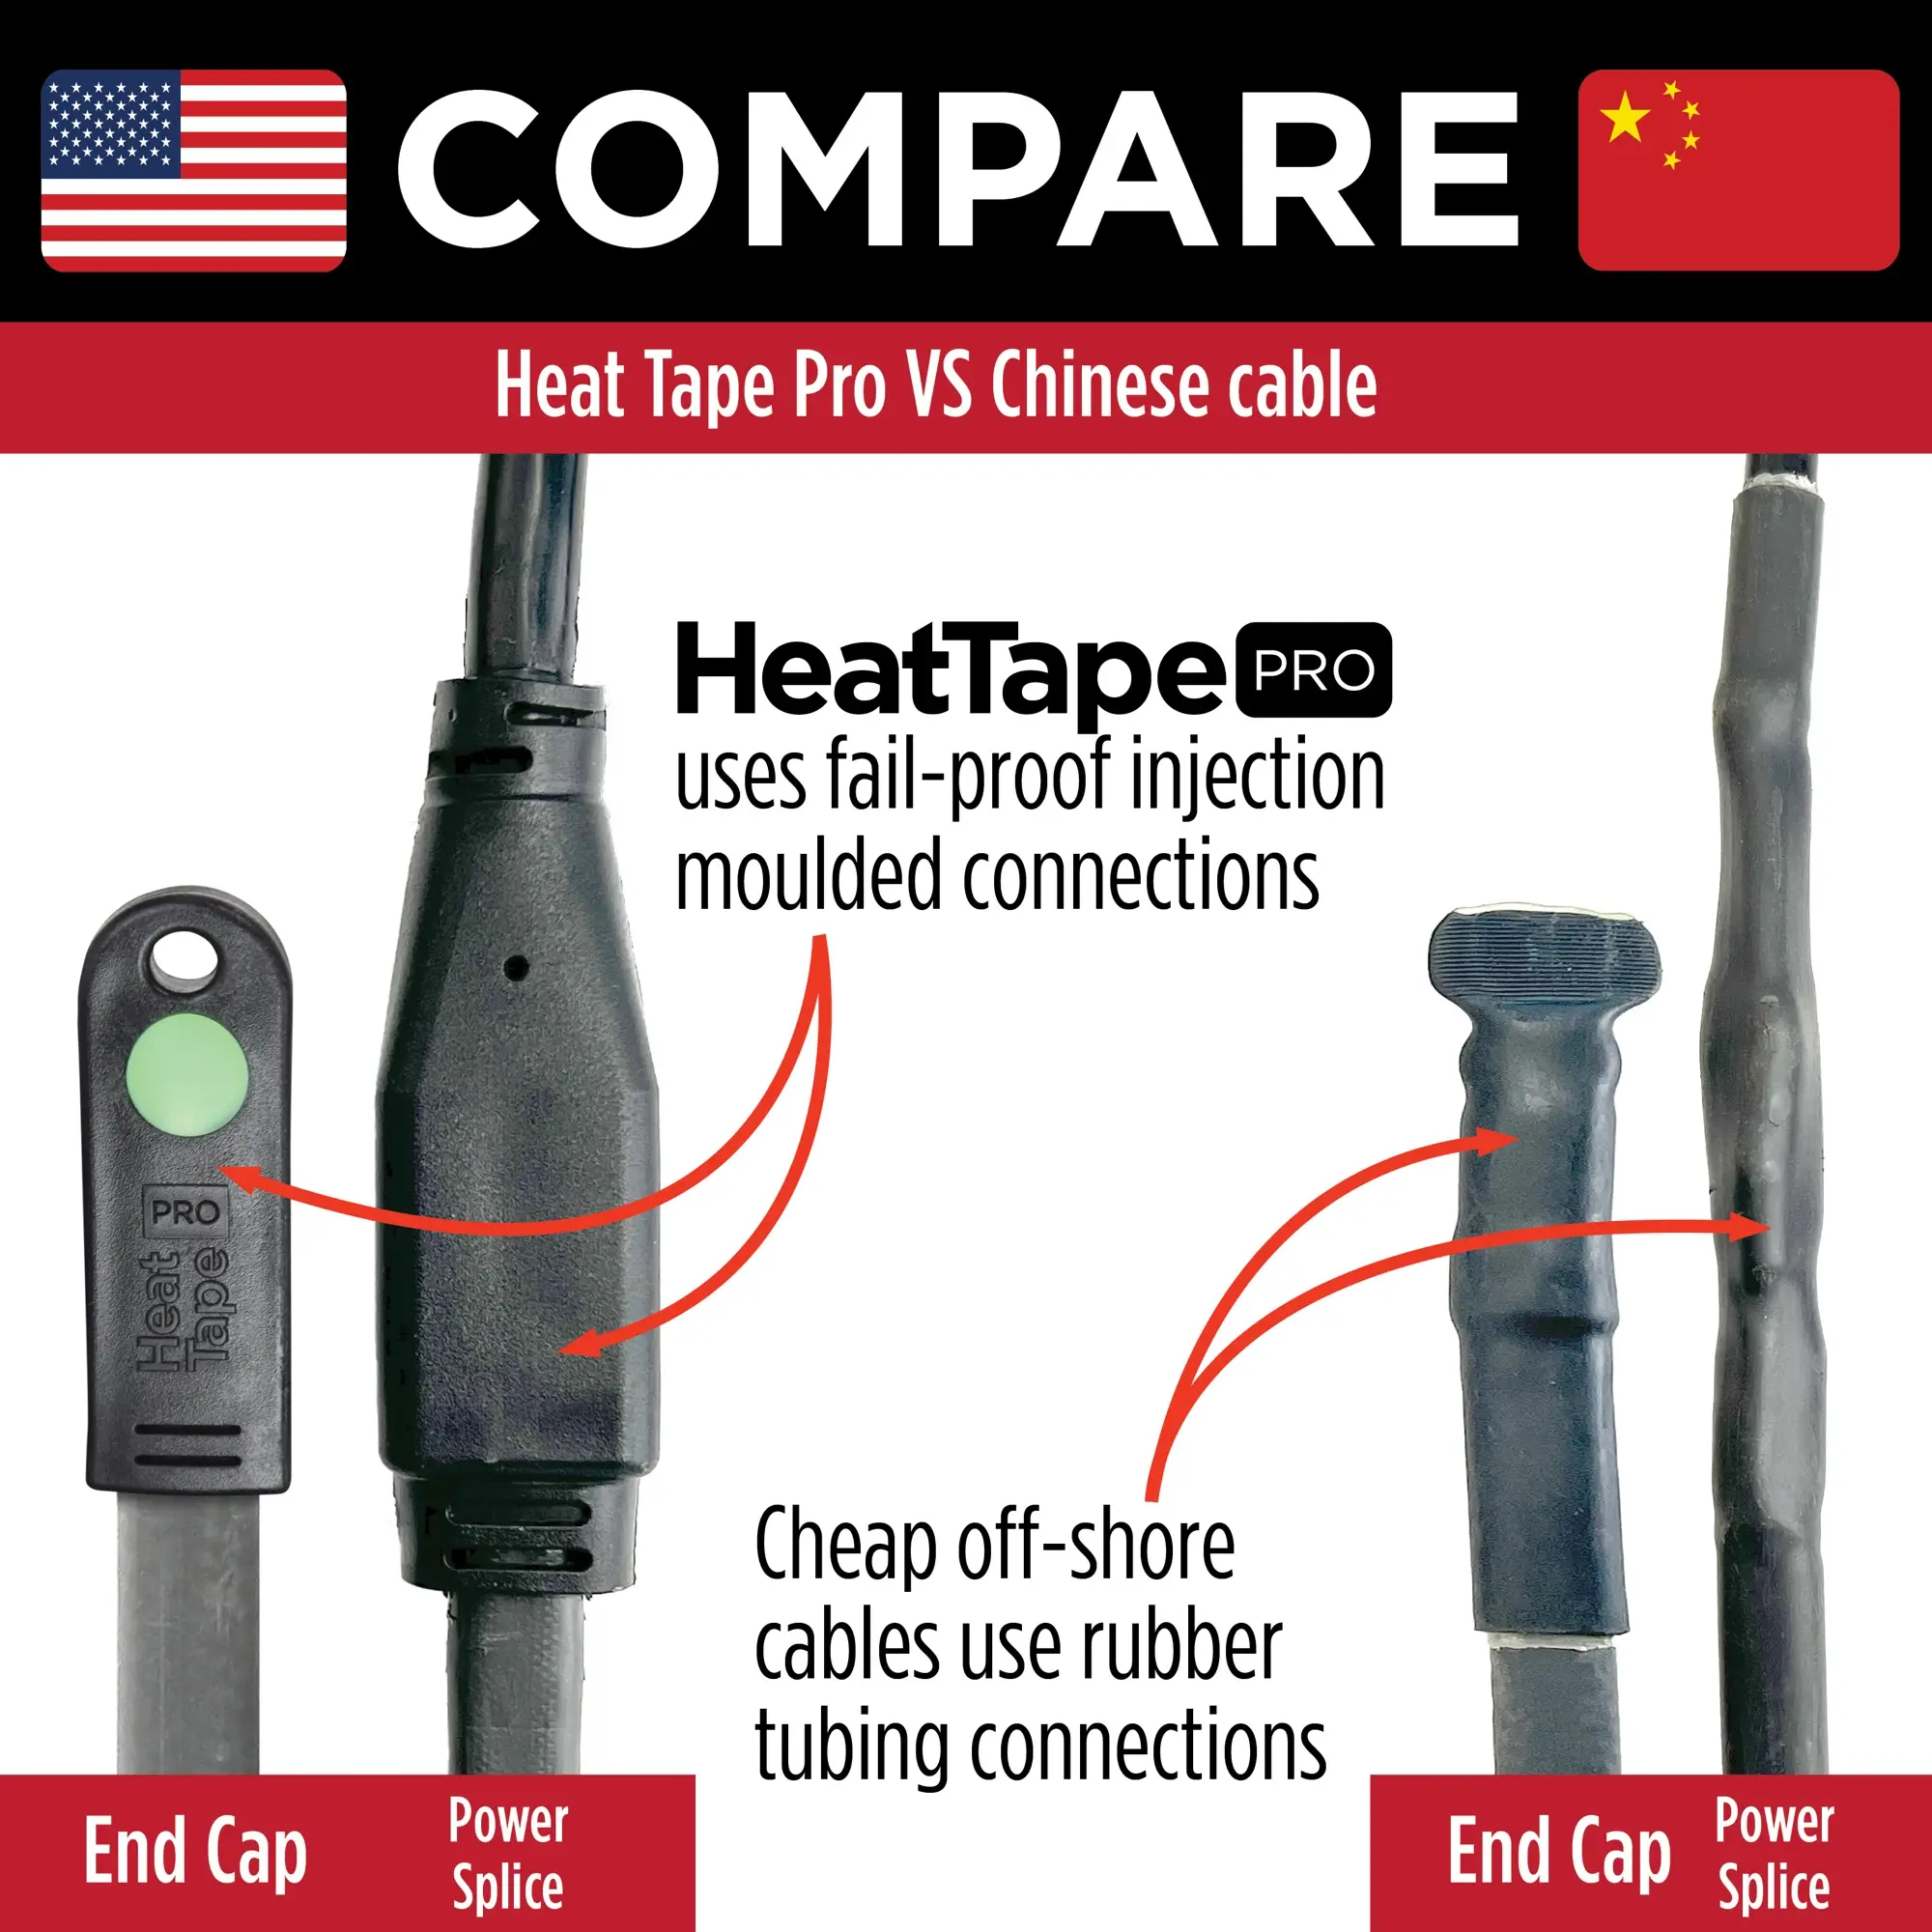
Yes. Unlike cheap constant-wattage cable, Heat Tape Pro can be repaired in the field using our TSK-723 Splice and Tee Kiit. This avoids replacing an entire run just for a small cut.
There are many many differences. Self-regulating heat tape automatically adjusts its output depending on temperature, making it safer, longer-lasting and more energy-efficient. It can be safely overlapped, come into contact with combustibles like leaves and pine needles, can be repaired if damaged and is designed to be effective at any outdoor temperature. Self regulating heat cable can be used on any roof material at any slope. Constant wattage heat tape stays the same temperature at all times, which can lead to overheating, shorter lifespan and higher electric bills. Other drawbacks of constant wattage heat cable include the fact that you are required to remove combustibles from around the cable throughout the heating season, it's not effective below 15°F, it cannot overlap or come into contact with itself without risk of fire and electrical shorting and has a one year manufacturers warranty. Constant wattage heat cable is not approved for use on any roof material other than asphalt shingles, including rubber, metal, synthetics, etc. Constant wanted heat cable is also not approved for use on flat or low sloped services of any type.
Heat Tape Pro ships the same day from our Minnesota warehouse don’t ‘cha know. (Assuming you don’t order too late in the day!). Orders placed over the weekend will ship the next business day.

Heat Tape Pro is the #1 recommended product for Roof & Gutters
'Structure Talk' Podcast
Roof De-icing Cables
Trustindex verifies that the original source of the review is Google. I contacted radiant solutions company through their contact us tab on the website. Matt answered my email very promptly. I had a few more questions so I sent him another email and he called me right back by phone instead of chatting back-and-forth n email. He took the time to answer all my questions and give me inside tips on installation. I highly recommend them and I highly recommend Matt as a sales / customer service representative.Posted onTrustindex verifies that the original source of the review is Google. We are so pleased with the service and product from this company. The self regulating pipe heating cables that we have purchased have kept our pipes in our RV from freezing and running smoothly in this super cold winter. They have been easy to install and monitor. I would highly recommend ALL of the products from this company.Posted onTrustindex verifies that the original source of the review is Google. I've worked with these guys a few times now and they've been super helpful every time and are great to work with!Posted onTrustindex verifies that the original source of the review is Google. Amazing products and the best customer service! Have used them for a while and will continue to do so. This company is great to work with.Posted onTrustindex verifies that the original source of the review is Google. This is a fantastic company with well thought out and high-quality products. The 'kits' for cable ends, tees and terminals are complete and easy to install. All instructions are complete and excellent support is available. The paper installation manual is a complete planning and installation guide. Company support is first rate. Highly recommended vendor.Posted onTrustindex verifies that the original source of the review is Google. Excellent products from an outstanding company. Very glad everything is American made and it shows! I contacted the company twice before ordering and I received an answer within the hour. Shipping was vey fast since I ordered on Friday and was delivered on Monday! The 10 year warranty is superior and instructions are clear. There is not another heat cable on the market that even come close to these guys.Posted onTrustindex verifies that the original source of the review is Google. Great installation of heat tape on two roof sections. Installer showed up on time, did a professional job, and checked that it worked.Posted onTrustindex verifies that the original source of the review is Google. As an installer of Heat Tape on homes, Radiant Solutions provides super high quality heat cable. It’s a mix of ease of installation and some of the best customer support that makes this above and beyond expectations. The waves this cable creates in rooflines is very satisfying to install and look at. Grip Clips are the best and strongest way to securely mount it to the roofline.Posted on