PyroSelf – Snow and Ice Sensor Kit X

Full Kit with Controller, Remote & Mount

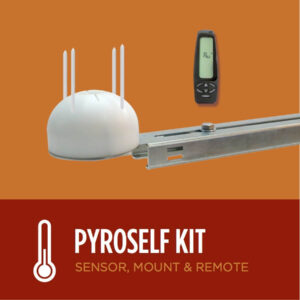
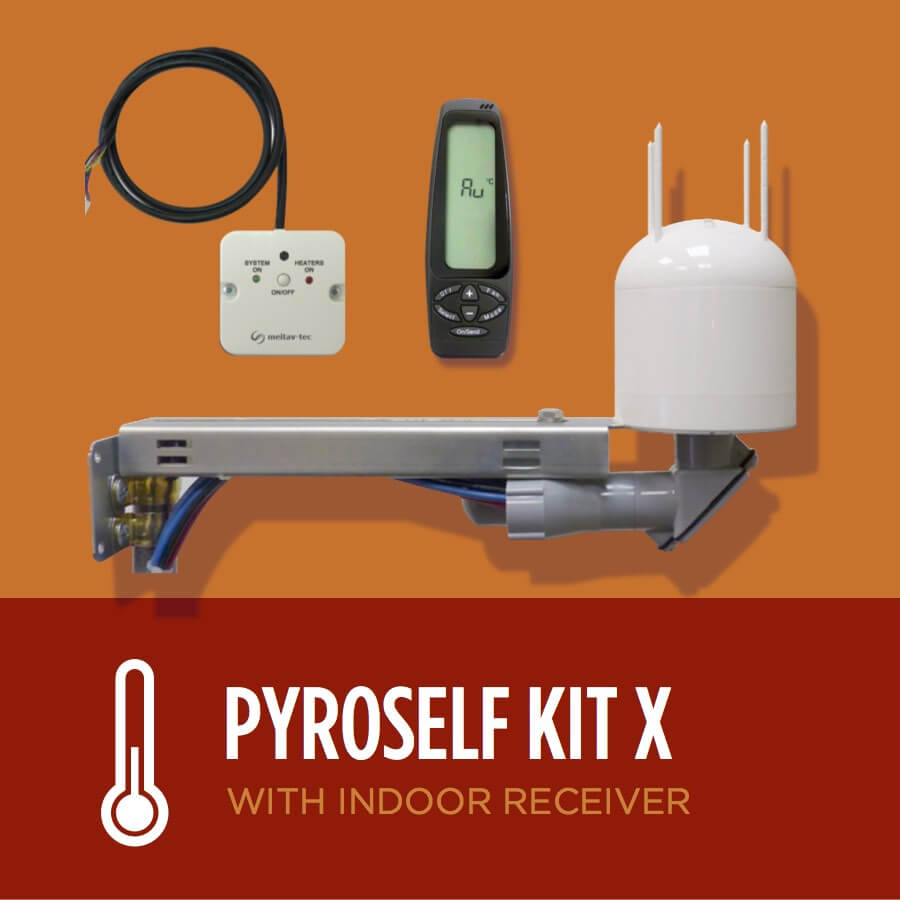
Roof snow and Ice sensor kit that contains the sensor, the sensor mount, the remote control and an internal receiver –so you don’t have go outside to get line-of-site with your unit. For use with your hard-wired ice dam heat tape. Early detection of snow and ice precipitation and subsequent activation of your heat tape can maximize the effectiveness of your ice dam prevention system.

$874.95

5 in stock

SKU: RSC-PYRO-300 Category:
FREE Shipping

Product Details

PyroSelf – Snow and Ice Sensor Kit X

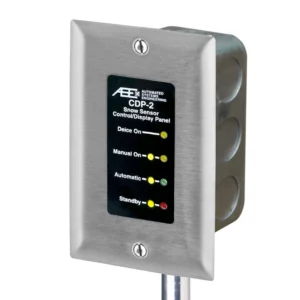
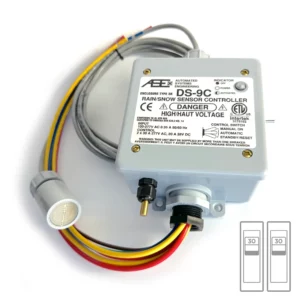
Our PYROSelf Snow and Ice Melt Sensor-Controller Kit X is an all-in-one snow sensor & controller for light commercial and residential use. A “plug and Play” controller for frost protection, as well as ice and snow melt applications. When receiving a signal from the built-in snow sensor, it activates the contactors energizing the heating elements. Based on the configuration and settings, the two outputs to the two zones are activated together or in staggering mode. The outdoor temperature set-point as well as the ambient lower limit temperature can be easily set by the remote control. The Technician Settings mode allows the installer or technician to adjust the parameters for customized installations using the remote control. The adjustable time delay (Hold On) is adjustable in the range of 0 up to 48 hours. Installing the system is a quick and easy task. Apart of mounting the metal box to the wall, the installer needs only to connect the line in and line out wires in the marked terminals and the system is ready to work. Kit includes: the PYROself-X Sensor, the PYRO bracket, and the PYRO remote control and the PYRO IRP receiver.

5/5

“Heat Tape Pro did exactly what I needed it to do. Now I don’t have to worry about water leaking into my house, because I can tell when it’s working by the little light on the end of the cable.”

-Michael P.
Amazon Customer

4/5

“This heat tape works as advertised. It was delivered to me fast, and although it’s a little complicated to install, the documentation is good..”

-Shaun D.
Radiant Solutions Customer

5/5

“I install thousands of feet of heat tape every year. This is the best stuff I’ve found to protect my customers homes and give them the piece of mind they need.”

-Patrick B.
Professional Installer

Frequently Asked Questions

There’s two main steps to determining how much Heat Tape you need:

  1. Make a couple simple measurements of your house/roof, while noting a couple aspects of your situation
  2. Use Our Heat Tape Calculator to plug in those numbers, which can tell you how much heat cable you’ll need

See Below


Measuring for Heat Tape

Measuring is not difficult and you can make measurements without going up on your roof or using a ladder if you err on the side of overestimating the distances. Here’s Radiant Solutions Guide to Measuring for Heat Tape, which gives a detailed overview of measuring and some tips and resources, if you think you need it.

The Heat Tape Calculator

Once you have your measurements, you can use our Heat Tape Calculator to help you determine the length of Heat Tape Pro you need, the number of Heat Tape Clips you’ll need, and misc. product considerations.

Yes!

Installing our heat tape on your standing seam roof can be very effective in combating ice dam formation. There’s two main products used to install heat tape on your standing seam metal roof: The S-5 SR Heat Tape Clip, and the standard ice dam heat tape clip.

S-5 SR Clip for Heat Tape & Standing Seam Roofs

Installing Heat Tape on a Standing Seam Roof with the S-5 SR Heat Tape Clip
The S-5 Heat Tape Roof Clip is a new, patented roof clip design specifically for standing seam applications with a focus on ease of install and effectiveness. It is used in conjunction with the S-5 Base, which needs to be purchased separately. The S-5 base is designed to clamp onto the seam of a metal roof as the S-5 Clip holds your ice dam heat tape into position. Can be set up in a single or dual-clip configuration. (See product page for more info)


Installing Heat Tape on a Standing Seam Roof with Standard Roof Clips

There are specific ways/configurations used when installing heat tape on a standing seam / metal roof using standard heat tape clips. The following (2.6 – figure 16.0 & 17.0) shows a snippet of the HeatTape Pro installation manual showing two different clip configurations, more info can be found in the manual itself: Heat Tape Pro installation Manual

The short answer is NO. Self-regulating heat cable does not turn itself on and off automatically. To do that you need to put the cable on a switched circuit or outlet or on a controller. Of course, you can also be old-school about it and simply plug and unplug as needed. 

“Self-Regulating” refers to the fact that these cables are temperature sensitive. Due to their construction, these cables sense changes in temperature along their entire length, demanding more power as temps fall and less when they rise. 

PipeFreeeze Pro™, Pipe Freeze Protection Solution has a built in thermostatic switch, meaning it will turn on and off on it’s own.

Heat Tape Pro™, does not contain a built-in thermostatic controller. We recommend adding the ThermaCord™ Thermostatic controller to turn your Heat Tape PRO to turn the cable on and off with changes in temperature.

You can install Heat Tape on pretty much any type of roof.

This includes, but is not limited to:

  • Asphalt Shingle
  • Cedar Shakes and Shingles
  • Slate
  • Spanish Tile
  • Metal
  • Flat Roofs (EPDM, TPO, Sprayed Urethane, etc.)

The type of roof you have determines the roof clips and accessories needed. Check out our Heat Tape Installation Accessories.

There is no difference.

The terms heat cable, heat tape and heat trace are all used interchangeably to described heated cables used to protect pipes from freezing, preventing roof and gutter ice dams from forming and for safeguarding temperature sensitive components.

Other terms we’ve seen used regarding Heat Tape are:

  • Heat Coils & Heating Coils – Heat Tape has been called this because of the way the zig-zag pattern looks like a heating coil-element (like inside of a toaster)
  • Gutter Trace – Heat Tape get’s called this because of the usage in and around gutters

The type of clip you need for your heat tap installation is based on what kind of roof you have.

We are building a hand guide to identify what kind of roof you have and find the clips that can/should be used with that roof-type.

View the Guide Explaining What Clips You Need Here

To know how many clips you need to buy, there are two things you need:

  1. Some Basic measurements regarding your installation area & some considerations to note
  2. Our handy Heat Tape Calculator to punch in your measurements & notes

We have a guide on How to Measure for Purchasing Heat Tape that will help you. Once you have your measurements, you can find our Heat Tape Calculator here.

Including a thermostatic heat tape switch or controller in your installation will cut power to your heat tape in times it is not needed. This will lessen your environmental footprint and save you money.

Savings will always depend on the weather and how often you have temperatures above the threshold that the switch turns on your heat cable. In most situations where heat cable is needed, savings will offset the cost of the ThermaCord and then some.

Yes We Do. However, it is fairly costly.

We have a calculated rate based on the product in your cart if you choose to ship to Canada or Alaska.
More can be found here.