Yes.
Radiant Solutions has the most comprehensive installation system for Heat Tape that exists. We make accessories to install heat tape on almost any kind of roof.
Click here to learn about product specifically for Natural Cedar Roofs
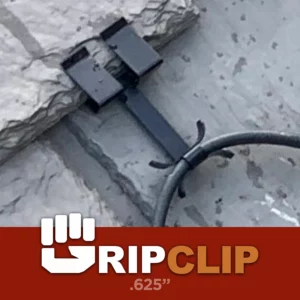
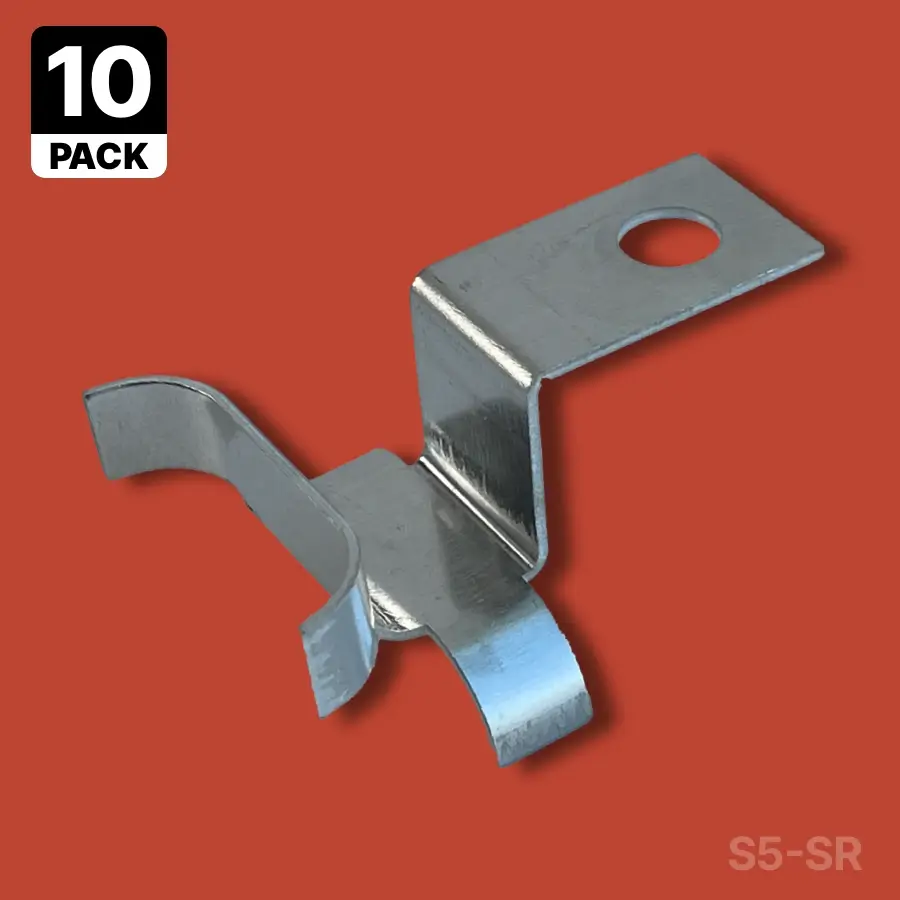
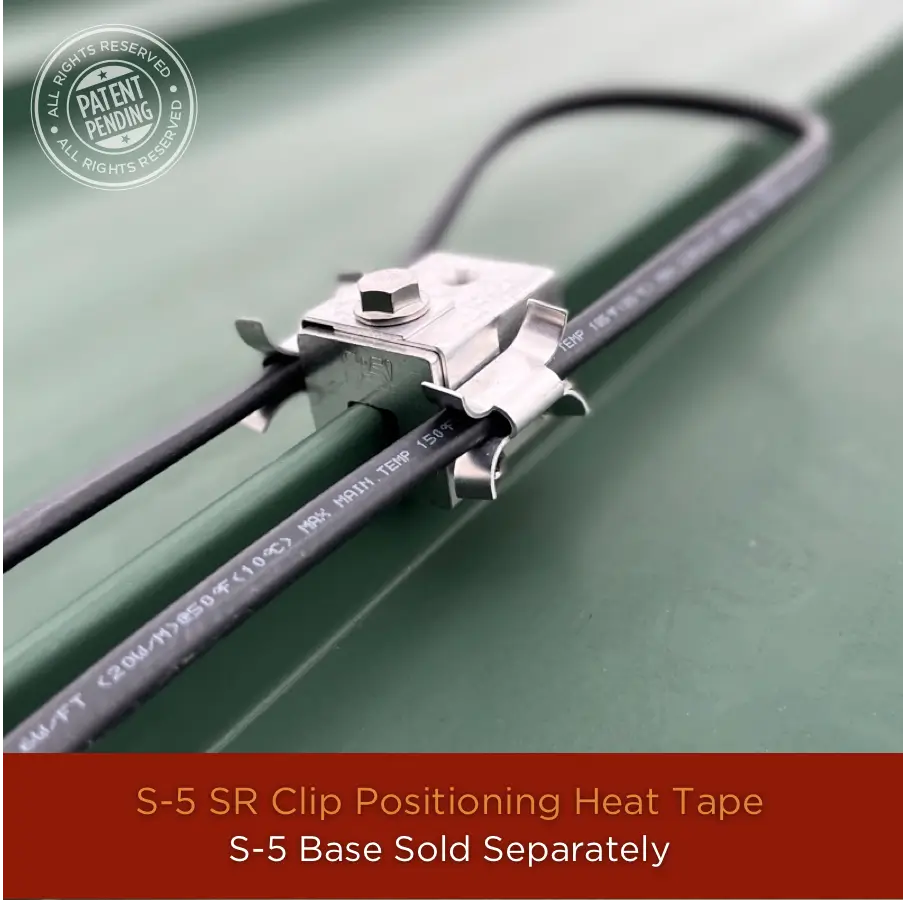
The S-5-SR Standing Seam Heat Tape Clip is the ultimate solution for the installation of ice dam heat tape on standing seam roofs. Uniquely designed to work with Heat Tape Pro & S-5 base clamps to firmly secure your heat tape to a standing seam roof without the need for fasteners or adhesives.
$16.95
5615 in stock
Allowing for easier installation then other standing seam heat tape clips, our S-5 SR clip can be installed 3 times faster because the clips can be installed on an S-5 without the cable, and then can be easily adjusted without the need to unscrew hardware. Features a curved cable-grip to prevent sharp metal-edges from cutting into and compromising your heat tape and/or the product warranty. Sold in quantities of 10. An S-5 Base is required to use this product.
The S-5-SR Clip is designed to be used with the S-5-S Base Clamp. It has radii and dimensions designed to closely integrate with the shape of the S-5-S Base Clamp. It can, however be used with other S-5 Clamps, however, the S-5-U (Universal) clip may work better.
Installing Heat Tape on Standing Seam Roofs requires a bit of awareness surrounding what type of roof you have. There are many popular styles of staging seams, each with a slightly different seam-profile that may require a specific type of clip and clamp. If you have a metal roof that isn’t a standing seam, you’ll require an entirely different system of clips.
To Identify If you have a Standing seam Roof, review the information here.
“Heat Tape Pro did exactly what I needed it to do. Now I don’t have to worry about water leaking into my house, because I can tell when it’s working by the little light on the end of the cable.”
-Michael P.
Amazon Customer
“This heat tape works as advertised. It was delivered to me fast, and although it’s a little complicated to install, the documentation is good..”
-Shaun D.
Radiant Solutions Customer
“I install thousands of feet of heat tape every year. This is the best stuff I’ve found to protect my customers homes and give them the piece of mind they need.”
-Patrick B.
Professional Installer
Radiant Solutions has the most comprehensive installation system for Heat Tape that exists. We make accessories to install heat tape on almost any kind of roof.
Click here to learn about product specifically for Natural Cedar Roofs
See Below
Measuring is not difficult and you can make measurements without going up on your roof or using a ladder if you err on the side of overestimating the distances. Here’s Radiant Solutions Guide to Measuring for Heat Tape, which gives a detailed overview of measuring and some tips and resources, if you think you need it.
Once you have your measurements, you can use our Heat Tape Calculator to help you determine the length of Heat Tape Pro you need, the number of Heat Tape Clips you’ll need, and misc. product considerations.
The short answer is NO. Self-regulating heat cable does not turn itself on and off automatically. To do that you need to put the cable on a switched circuit or outlet or on a controller. Of course, you can also be old-school about it and simply plug and unplug as needed.
“Self-Regulating” refers to the fact that these cables are temperature sensitive. Due to their construction, these cables sense changes in temperature along their entire length, demanding more power as temps fall and less when they rise.
PipeFreeeze Pro™, Pipe Freeze Protection Solution has a built in thermostatic switch, meaning it will turn on and off on it’s own.
Heat Tape Pro™, does not contain a built-in thermostatic controller. We recommend adding the ThermaCord™ Thermostatic controller to turn your Heat Tape PRO to turn the cable on and off with changes in temperature.
We are frequently restocking products and the one you need will soon be available. You can make a request to be notified when out of stock items are re-stocked.
Click Here to Submit your information to be notified of a Products Restock
Installing our heat tape on your standing seam roof can be very effective in combating ice dam formation. There’s two main products used to install heat tape on your standing seam metal roof: The S-5 SR Heat Tape Clip, and the standard ice dam heat tape clip.
Installing Heat Tape on a Standing Seam Roof with the S-5 SR Heat Tape Clip
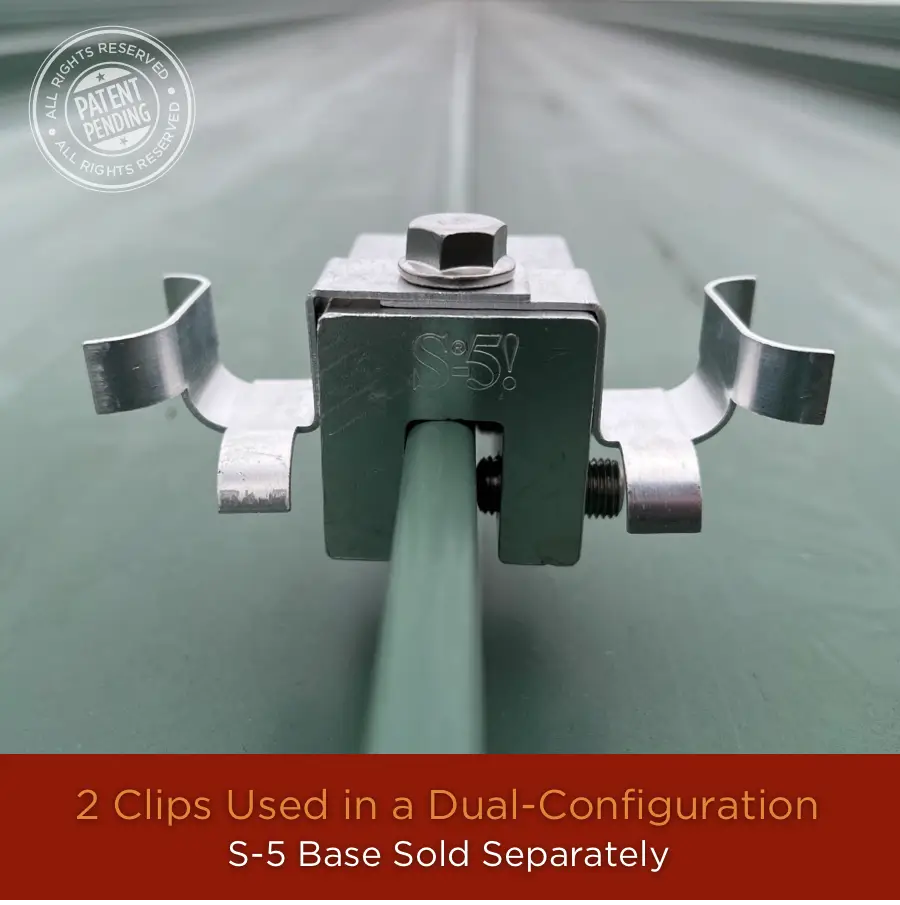
The S-5 Heat Tape Roof Clip is a new, patented roof clip design specifically for standing seam applications with a focus on ease of install and effectiveness. It is used in conjunction with the S-5 Base, which needs to be purchased separately. The S-5 base is designed to clamp onto the seam of a metal roof as the S-5 Clip holds your ice dam heat tape into position. Can be set up in a single or dual-clip configuration. (See product page for more info)
Installing Heat Tape on a Standing Seam Roof with Standard Roof Clips
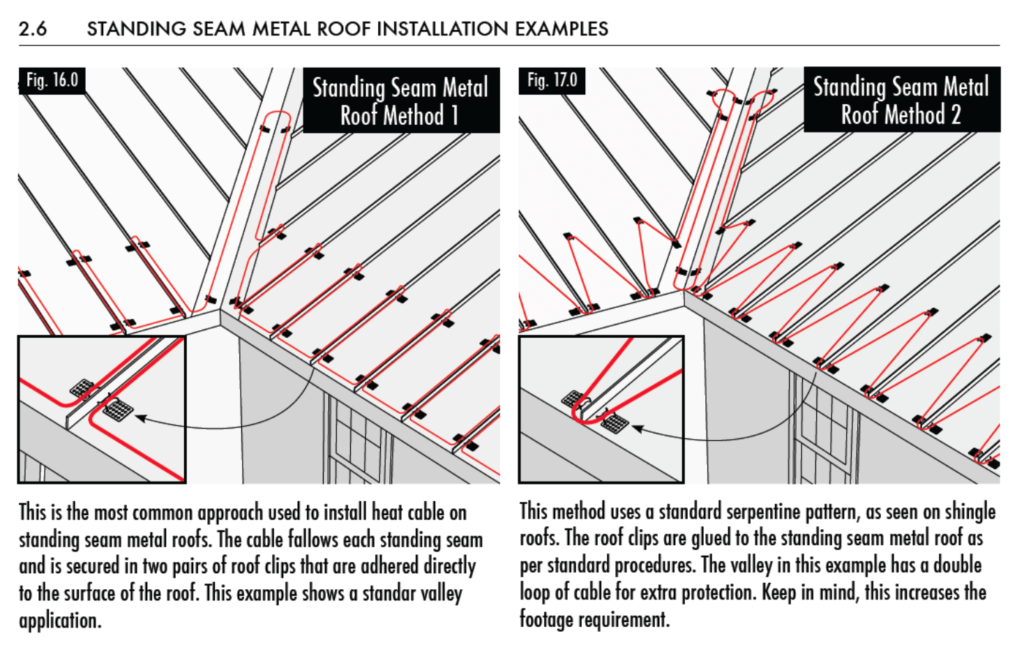
There are specific ways/configurations used when installing heat tape on a standing seam / metal roof using standard heat tape clips. The following (2.6 – figure 16.0 & 17.0) shows a snippet of the HeatTape Pro installation manual showing two different clip configurations, more info can be found in the manual itself: Heat Tape Pro installation Manual
Heat Tape Pro and Pipe Freeze Pro are offered in many lengths from 6-foot up to 150-foot. These products are not designed to be modified, so you should pick the length you need and work with that length. These cables should not be altered and doing so would void any warranty on the product.
We offer heat tape on spools from 250-foot to 1000-foot. These spools are designed to be cut to length, made into multiple cables, etc. Heat Tape on spools needs to be hard-wired into a junction box, or have a power connection plug-in manually added to it for use. It also requires ends to be properly sealed and terminated. When working with Heat Tape on spools, a Licensed Electrician should be utilized to assure proper wiring per regional codes and standards.
Measuring the area of your roof that is affected by ice dams so you know how much heat tape to get is not overly complex, but it does have a few variables. Use our Heat Tape Measuring Guide to understand the process and print a worksheet that you can use to make sure you have all the right numbers.
Once you have all the measurements and considerations you need, use our Heat Tape Calculator to calculate the size of heat tape you should get.
We have a calculated rate based on the product in your cart if you choose to ship to Canada or Alaska.
More can be found here.
Check out our full list of Frequently Asked Questions on our FAQ Page.
Take a Look at Our Heat Tape Installation Case Studies
Learn a Bit about Ice Dams and How & Why they Form