Installing Roof De-Icing Heat Cable in Valleys
What is a Valley?
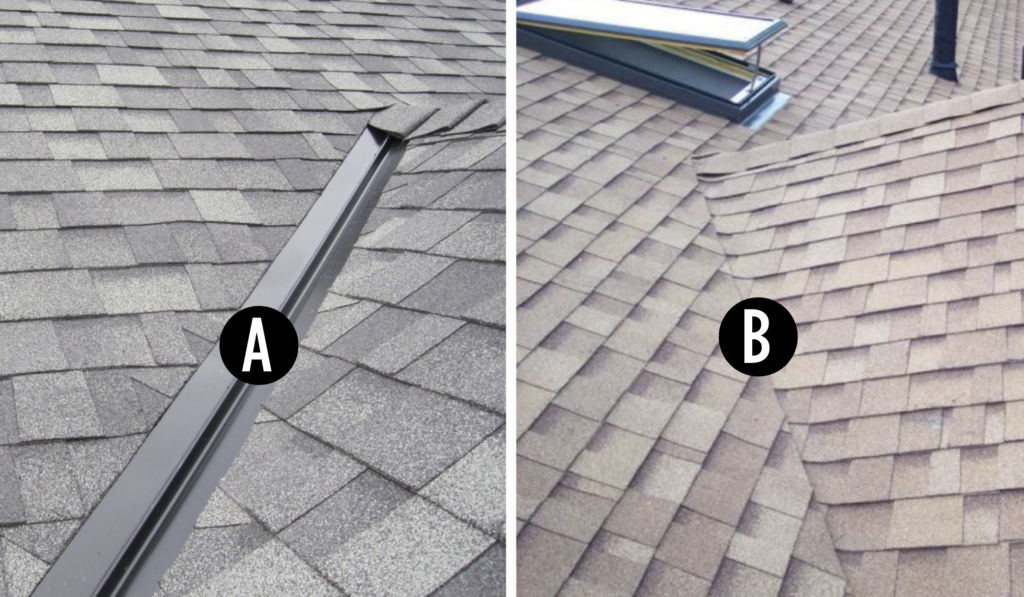
First things first. Let’s clear up the obvious question. A valley is simply a drainage line between two intersecting roof planes. A roof valley is no different than a valley in a mountainous landscape. It’s a low spot between two or more high spots. Valleys fall into two classifications, open and closed. An open valley (Point A in photo) is simply one where you can see the exposed valley flashing, which is represented on the left side of this photo. A closed Valley is exactly what the name suggests. No valley metal can be seen (Point B in photo).
Installing Heat Tape in Closed Roof Valleys
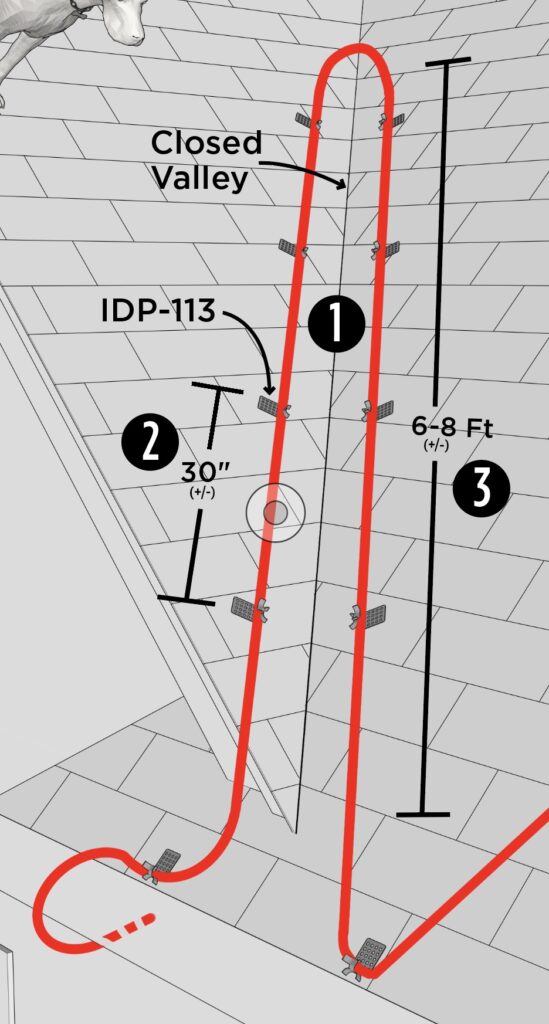
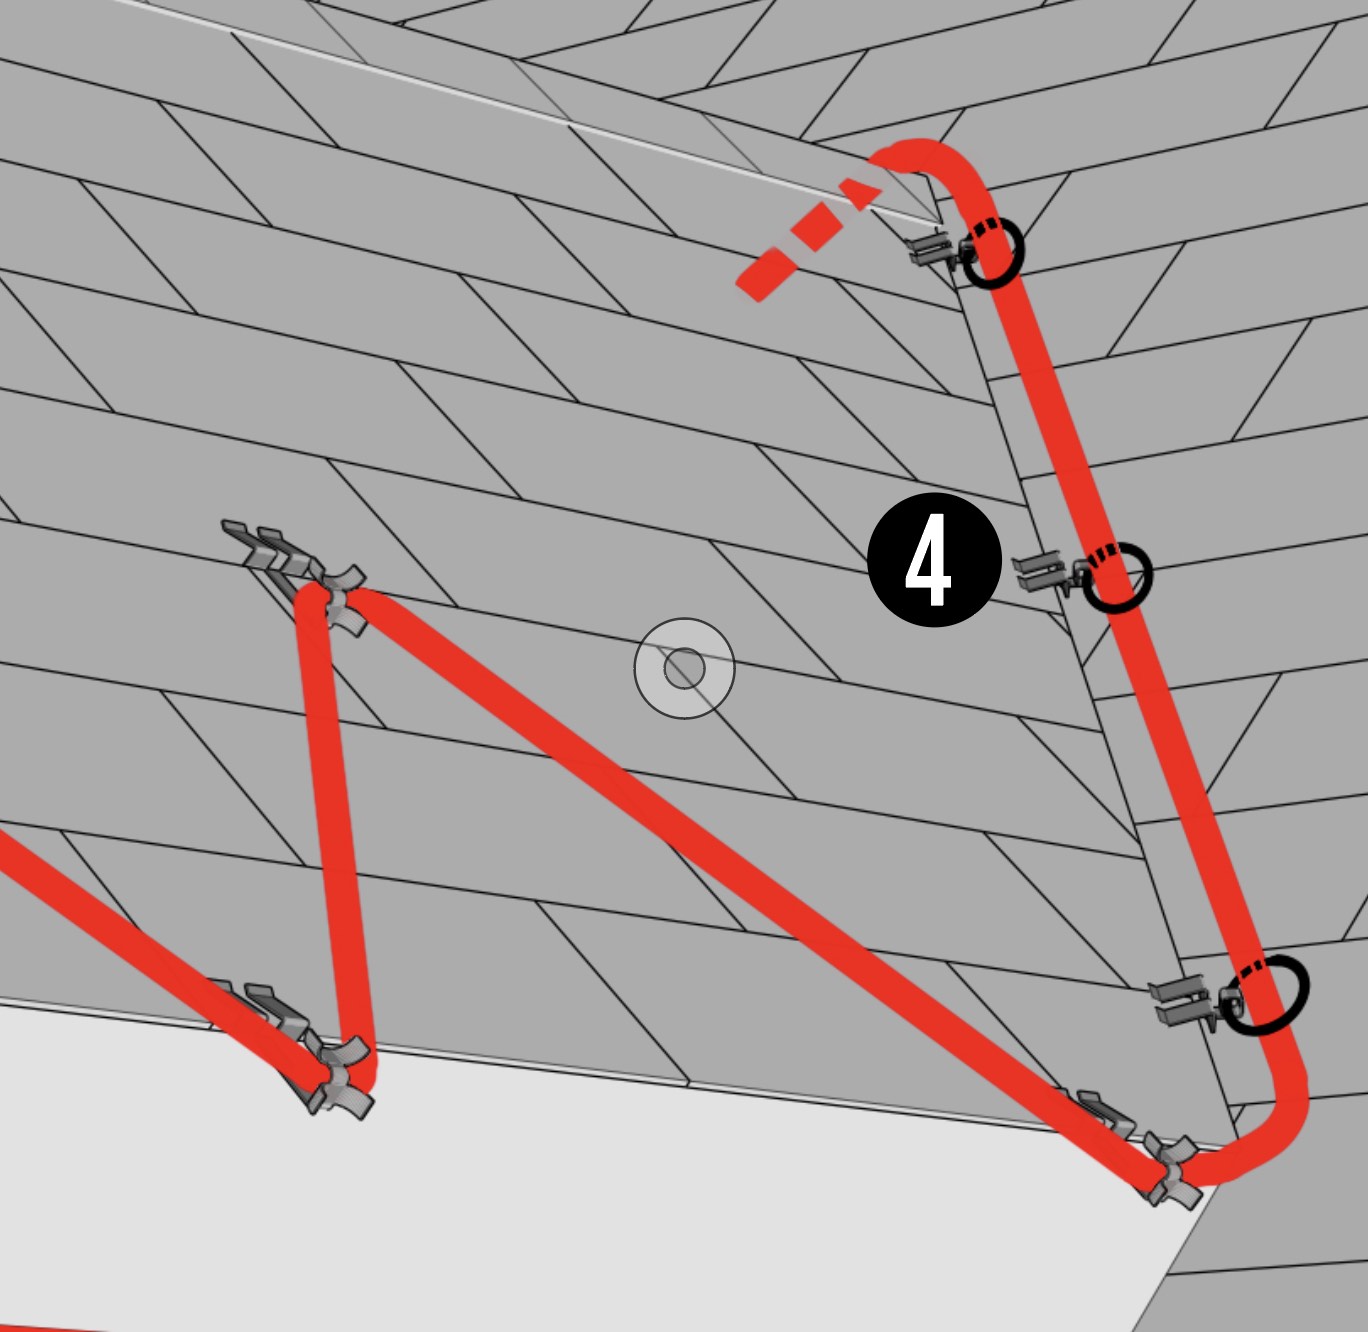
There are two basic approaches to installing roof de-icing cable on a roof with a closed or woven valley. The first employees a standard IDP-113 Nail On Heat Tape Roof Clip. (See Point 1). The traditional approach many old-school installers still follow is to drive nails through the shingles at each clip and apply a small dot of silicone sealant on top of each fastener location. Theoretically, this may do the job but if you are going to use the standard nail on roof clip, we suggest adhering the clips directly to the asphalt shingles with SureBond SB 190 and NOT drive nails or screws into your roof system. In either case, plan on spacing the clips about 30 inches apart going up the valley(See Point 2).
Multi-Purpose Clip
The other approach to installing heat cable in a closed asphalt shingle valley is to use the popular MPC-325 Multi-Purpose Heat Cable Clip (Point 4). Because this clip employs the patented GripClip™ body there is no risk of damaging the shingles with either nails or adhesives.
How Far Up the Valley Should Heat Tape Go?
Generally speaking, installing heat cable 6 feet to 8 feet up a standard roof Valley is adequate (See Point 3). If you are dealing with a low slope, roof, say somewhere between 3/12 and 5/12, you may want to run the cable a couple of feet higher up the valley.
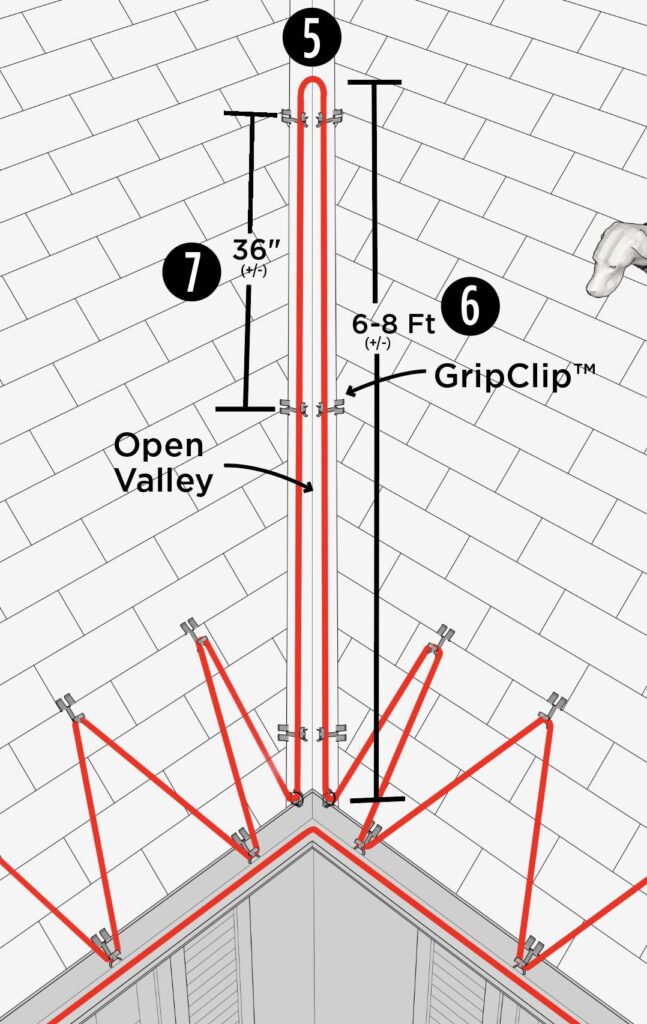
Installing Heat Cable in Open Valleys
In the case of open valleys, illustrated here (See Point 5), installing heat cable is a breeze. Simply slip GripClips onto the side of the shingles as shown, working your way up the valley. Space your GripClips around every 36 inches (See Point 7) and install the heat cable about 6 feet or 8 feet up the valley (See Point 8) . As mentioned before, lower roof slopes may require heat cable to be installed a few feet higher in the valley. Part of this depends on the nature of the construction and history of ice buildup in that particular valley.
A note on heat cable patterns in Valleys
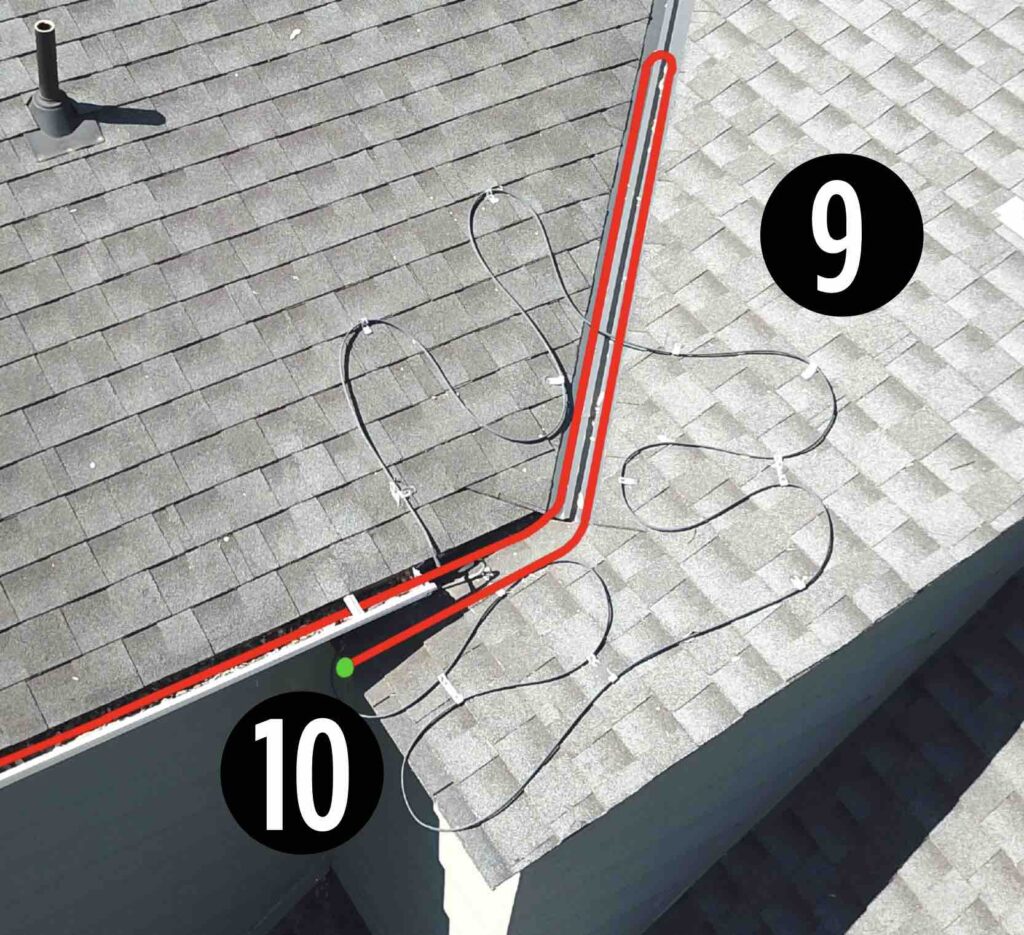
We get it. It’s human nature to think more is better but that isn’t always the case, in particular as it applies to heat cable in valleys. Getting back to the “think like water” principle, remember that the ultimate purpose of heat tape on roofs is to establish melted pathways through accumulating snow and ice. We have seen many installations over the years where overzealous people install cable and all sorts of wacky directions in valleys, thinking that adding more cable will help the problem. (See Point 8). This includes the notion of doing zigzag patterns across the valley flashing, from one side of the valley to the other and up each adjoining roof slope. Don’t be that guy.

Zigzag (i.e., ‘serpentine’) patterns will not improve the performance of heat cable in valleys. Simple is better. Trace the heat cable up and down the valley to create a clear melted pathway for water to use as an escape avenue out of the valley and off the roof below.
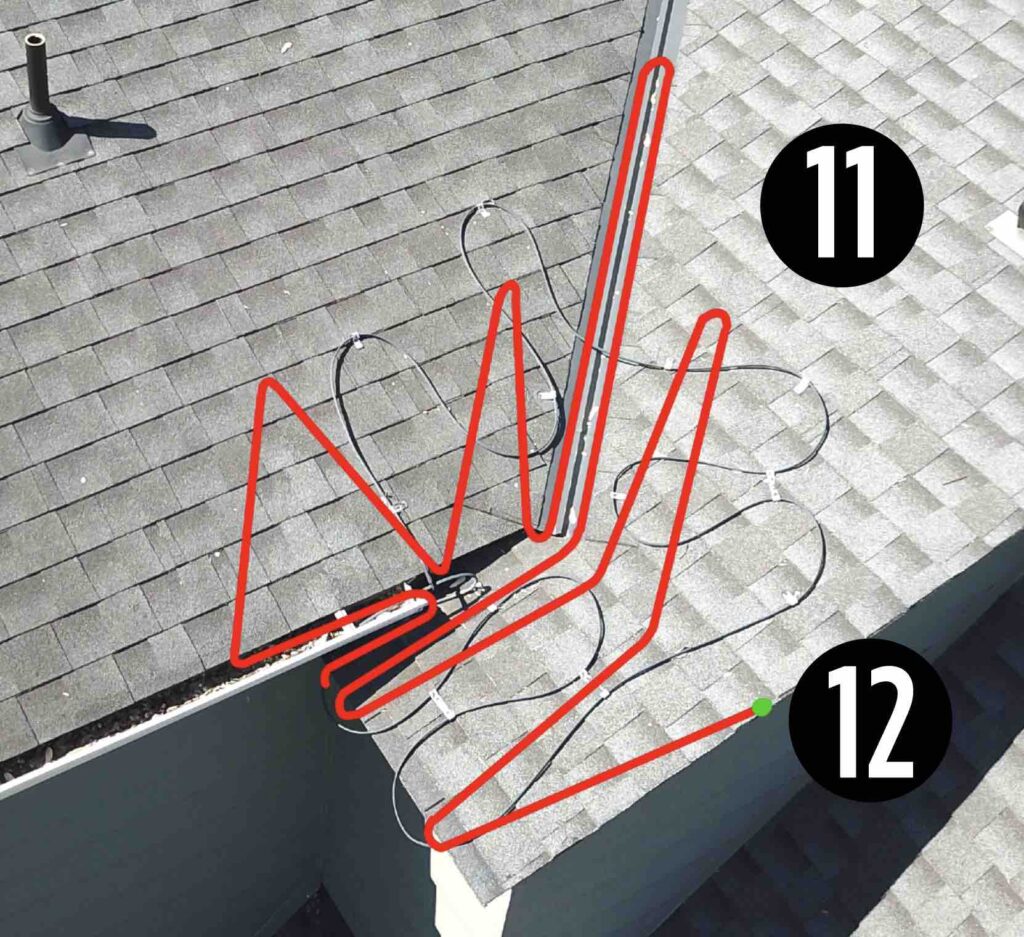
Point 11 Shows a nice valley installation. Notice that there is a linear path created by the cable to allow water to funnel off the roof from the top of the heat cable patter to the edge of the roof.
The next drawing (See point 9) shows a very simple application, which can be effective in valleys with less severe ice issues. Regardless of heat cable installation pattern, make a practice of installing the GlowCap in an area that is visible from the ground so you can verify your heat cable is working.