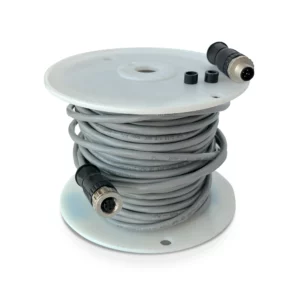

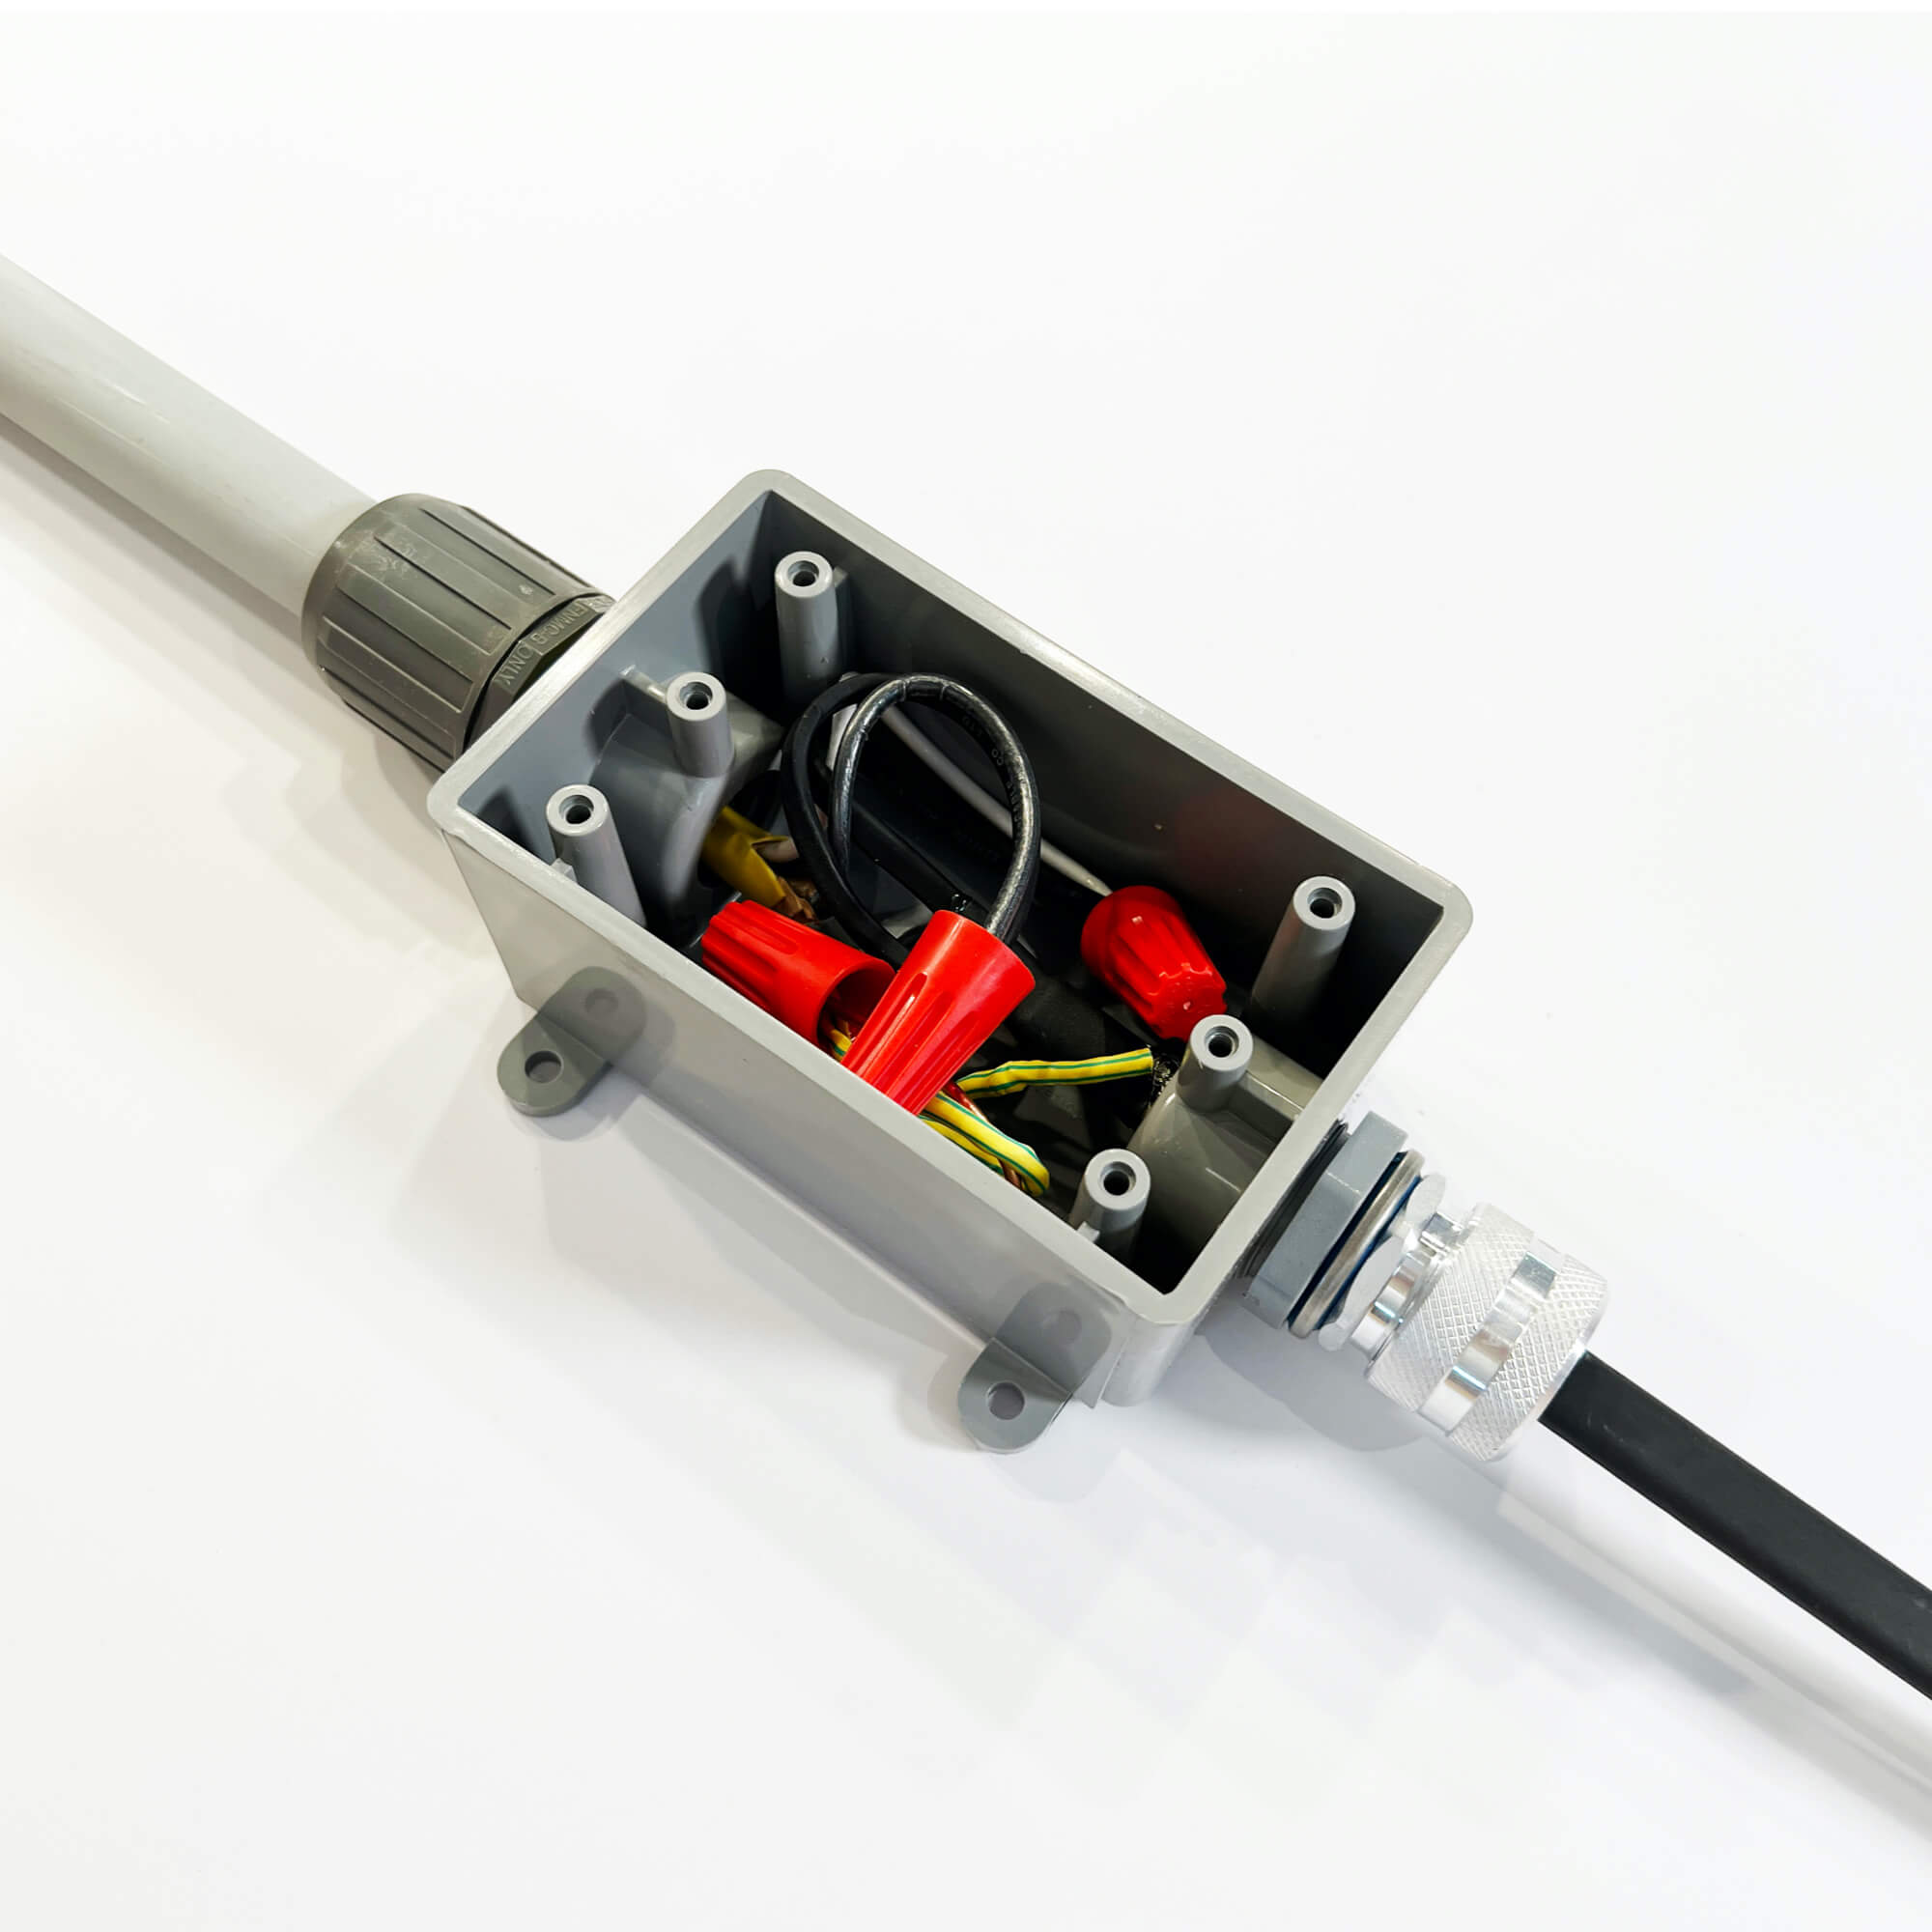
Used to make a direct, hard-wired power connection inside a junction box with your field-assembled Heat Tape configuration using Heat Cable Spools. Junction box and end seal not included.
$34.95
808 in stock

The Ice Dam Heat Tape Hard-wired Power Connection Kit works with all 10mm-13mm Self-Regulating Heat Tape / De-Icing Cable. When using with cable not manufactured by Radiant Solutions, refer to cable guidelines and instructions.
“Heat Tape Pro did exactly what I needed it to do. Now I don’t have to worry about water leaking into my house, because I can tell when it’s working by the little light on the end of the cable.”
-Michael P.
Amazon Customer
“This heat tape works as advertised. It was delivered to me fast, and although it’s a little complicated to install, the documentation is good..”
-Shaun D.
Radiant Solutions Customer
“I install thousands of feet of heat tape every year. This is the best stuff I’ve found to protect my customers homes and give them the piece of mind they need.”
-Patrick B.
Professional Installer
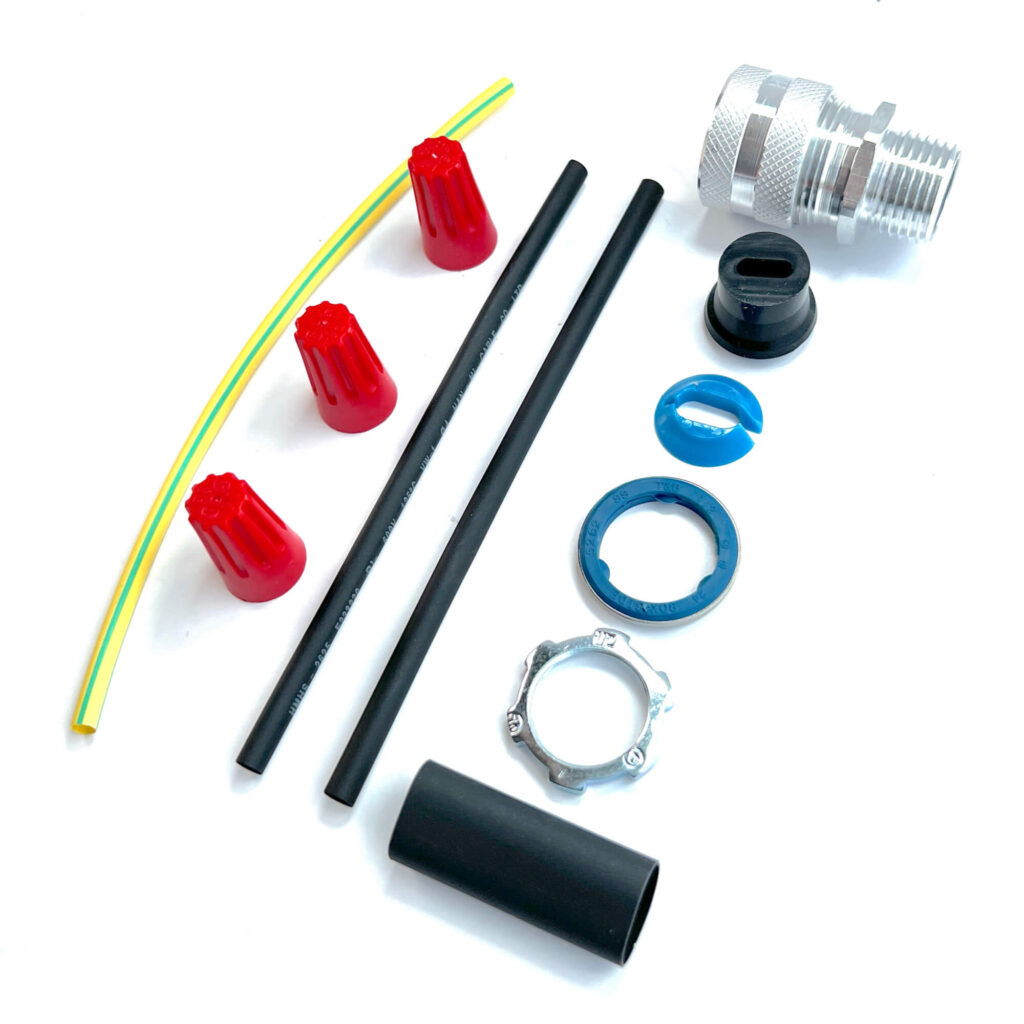
The HCK-M-1 is a field-assembly power connection kit that lets you make a permanent, hard-wired electrical connection for both 120V and 240V self-regulating heat tape systems. Instead of plugging into an outlet, you wire the heat tape directly into your home’s electrical system through a junction box. It’s designed for custom installs using bulk Heat Tape Pro.
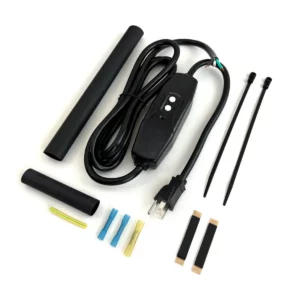
Each kit contains the components needed to hard-wire one roof de-icing cable run: wire nuts, heat shrink tubing, mastic, and connection hardware. What’s not included: the junction box itself and an end seal kit—you’ll need to purchase those separately.
We recommend it. While the connections themselves are straightforward, the kit ties into your home’s electrical system and must meet local code. A licensed electrician ensures the installation is safe and compliant.
No. You’ll need to provide your own junction box. The kit supplies the internal connection components that go inside.
It works with all 10–13 mm self-regulating roof de-icing cables. While designed for Heat Tape Pro, it’s also compatible with most other self-regulating cables on the market.
One kit makes one power connection. For multiple cable runs, order one kit per run.
Yes. It’s UL-listed and approved for use in the U.S. and Canada.
Hard-wiring is the best choice for permanent, large, or custom systems where you don’t want visible cords. Plug-in systems are simpler for most homeowners, but hard-wiring creates a cleaner, more professional finish.
Only if you follow all electrical codes. In most cases, we recommend leaving it to a licensed electrician.
Call us at 952-444-2044. We’ve been solving ice dam problems for decades and can help you choose the right connection method for your home.
We keep them in stock and ship same day from Minnesota, don’t ‘cha know (assuming you don’t order too late in the day!). Orders placed over the weekend will ship the next business day.
Click here to view or download the installation manual.
PipeFreezePRO comes with one or more 30ft rolls of high-quality fiberglass tape, but you can use any tape with a temperature rating of 150º F and above. Self-adhesive aluminum foil tape can be used but avoid standard tapes, including electrical tape and duct tape because they lose their adhesion when exposed to heat. Remember, it’s imperative to cover the pipe/heat tape assembly with pipe insulation (1/2″ minimum thickness). Think four easy steps: 1) cable on pipe, 2) tape on cable, 3) insulation on pipe/cable and 4) tape on insulation.
Pipe Freeze PRO can be overlapped during installation. This is a fundamental advantage of self-regulating heat cable over cheap, constant wattage cable found in hardware stores is that it can be overlapped without risk of shorting out or catching fire. So yes, overlap away!
The amount of heat cable needed for pipe freeze prevention is determined by a couple of simple factors including: Length of pipe, diameter of pipe, distance to power supply and number of valves.
Most of the time, we do not recommend a spiral cable application because it’s simply not necessary. It requires 3x the cable to do the same job.
Therefore, simply use a straight, single run of cable affixed to the bottom of the pipe (think 6 o’clock position) using the provided fiberglass installation tape. Next, add 1 foot of cable for every valve because you will be wrapping the valve with cable. For pipes less than 1″ in diameter, a single cable run is sufficient. For larger pipes, two cable runs are recommended. Keep in mind that plastic pipes are less thermally conductive so you may choose to use two cable runs on larger plastic pipes to be safe. Finally, if your outlet isn’t close to the pipe you are treating, factor in enough heat cable to reach your outlet (Pipe Freeze PRO does come with a 36″ power cord).
Finally, you must install insulation on your pipe and heat cable assembly in order for the system to operate effectively. See instructions for further details.
The cable can be exposed to wetness but the thermostat must stay dry to function properly. Use Pipe Freeze PRO for pipe freeze prevention applications only.
Consider using Heat Tape Pro inside of open drain pipes as that cable is rated for use in wet areas.
We are frequently restocking products and the one you need will soon be available. You can make a request to be notified when out of stock items are re-stocked.
Click Here to Submit your information to be notified of a Products Restock
Heat Tape Pro has the most comprehensive installation system that works on almost any kind of roof type.
For information about installing Heat Tape Pro on a Natural Slate Roof, Click here.
For information about installing Heat Tape Pro on a Synthetic late Roof, Click here.
Pipe Freeze Pro’s integrated thermostat turns power on and off automatically to the cable to save electricity. The thermostat is the lump located between the power cord and the heat cable. The thermostat triggers the cable to turn on at 37ºF and off at 50ºF, with a sensitivity range of +/- 4ºF. It’s a great feature that makes Pipe Freeze Pro unique among heat cables on the market.
Yes and no. The cable is approved for exposure to wet conditions but you should keep the thermostat dry for proper operation.
No. The thermostat need only be exposed to cold air. It does not hurt to have the thermostat attached to the pipe but it is not necessary. If you choose to attach it to the pipe keep in mind that the thermostat should not be covered with insulation.
No. You want the thermostat to react to the cold environment so it triggers the Pipe Freeze Pro to turn on.
Every Length of Heat Tape Pro has a cord length of 10-feet that is not included in the listed/state length. Meaning: A 100-foot Heat Tape pro will have a 100 feet of heated cable + a 10-foot unheated power cord.
Every Length of Pipe Freeze Pro has a cord length of 3-feet (36″) that is not included in the listed/state length. Meaning: A 30-foot Heat Tape pro will have a 30 feet of heated cable + a 3-foot unheated power cord.
Radiant Solutions has the most comprehensive installation system for Heat Tape that exists. We make accessories to install heat tape on almost any kind of roof.
Click here to learn about product specifically for Natural Cedar Roofs
Check out our full list of Frequently Asked Questions on our FAQ Page.
Take a Look at Our Heat Tape Installation Case Studies
Learn a Bit about Ice Dams and How & Why they Form